Turn on suggestions
Auto-suggest helps you quickly narrow down your search results by suggesting possible matches as you type.
Showing results for
Turn on suggestions
Auto-suggest helps you quickly narrow down your search results by suggesting possible matches as you type.
Showing results for
- Graphisoft Community (INT)
- :
- Knowledge Base
- :
- Modeling
- :
- Stair Tool Basics - Modelling Stairs With Monolith...
Options
- Subscribe to RSS Feed
- Mark as New
- Mark as Read
- Bookmark
- Subscribe to Topic
- Printer Friendly Page
- Report Inappropriate Content
Stair Tool Basics - Modelling Stairs With Monolith Terrazzo Finish (Continuous Single Layer Finish)
Graphisoft
Options
- Subscribe to RSS Feed
- Mark as New
- Mark as Read
- Bookmark
- Subscribe to Topic
- Printer Friendly Page
- Report Inappropriate Content
on
2017-10-24
01:22 PM
- edited on
2021-11-29
02:09 AM
by
Rubia Torres
The Stair Tool in ARCHICAD 21 works with Treads and Risers that are stored and handled as separate GDL elements. This means that the lines between them will appear on Elevations even if they are made of the same building material. These lines are eliminated on Sections since the sub-elements of stairs - like all other objects - use building materials as of ARCHICAD 21, so their intersections can be handled properly. You might need to provide drawings on which these lines on the Elevations do not show up. Let’s see different workflows of modeling the Stair to achieve this goal:
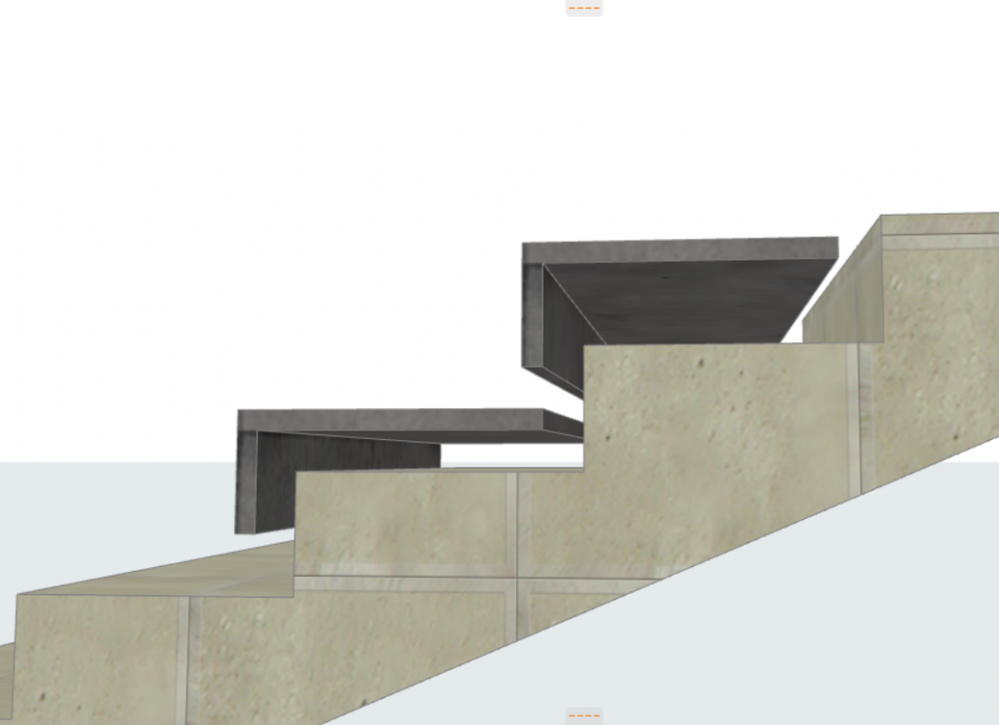

- Method #1: Create a custom L-shaped Tread
- Method #2: Create a custom Tread that replaces all Treads and Risers on the whole Stair in one piece
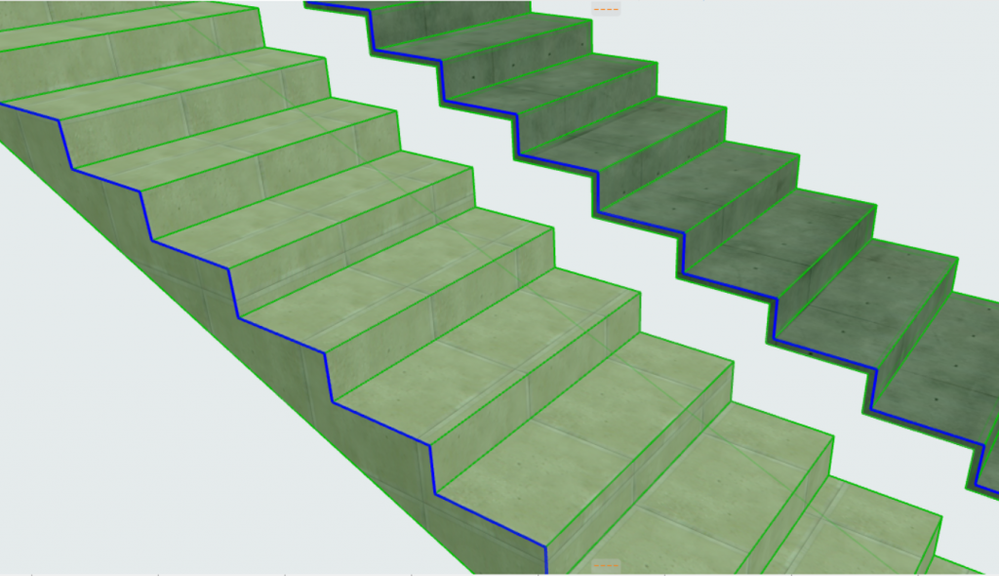
- Method #3: Create the Finish of the Stair with a separate Stair - as monolith structure - and place it on top of the other Stair that only has structure and no Finish
1. Method #1: Create a custom L-shaped Tread

- Finish modeling your Stair with regular terrazzo Treads and Risers.
- The Stair now looks correct on Sections, the only task is to eliminate the lines between the Treads and Risers on the Elevation.
- Select the Stair and go to Edit mode.
- Select one Tread and one Riser and convert them to Morphs.
- Exit Edit mode.
- Select the two Morphs and unite them (Boolean Operations > Union).
- Select the Morph and save it as a Stair Tread (File > Libraries and Objects > Save Selection as > Stair Tread). As the last step of saving you must set the orientation and the position of the new Tread. When doing this make sure to pick the centre of the most outer line of the Tread. If you use nosing, this line is the most outer line of its bounding box. You might need to mark it with guidelines before this step.
- Now you can remove the Morph by deleting it or putting it on a hidden layer, you don’t need it any longer.
- Select the Stair and go to Edit mode.
- The Riser that was selected and converted to Morph is now invisible. (Its visibility is controlled and shown by the checkbox in Info Box > Step Settings of the Riser sub-element when in Edit mode.) Despite its hidden state you can still select it in Edit mode. Select this Riser and all other Risers along with it and hide them by unchecking the checkbox in Step Settings.
- The Tread that was converted to Morph is also hidden. Unhide it by using the same checkbox.
- Now select all Treads and change them to the new L-shaped custom Tread by going to Tread Settings and selecting the previously saved L-shaped Tread library part.
- As a result, you can see that one of the two lines between Treads and Risers have been eliminated in 3D and on the Elevation.
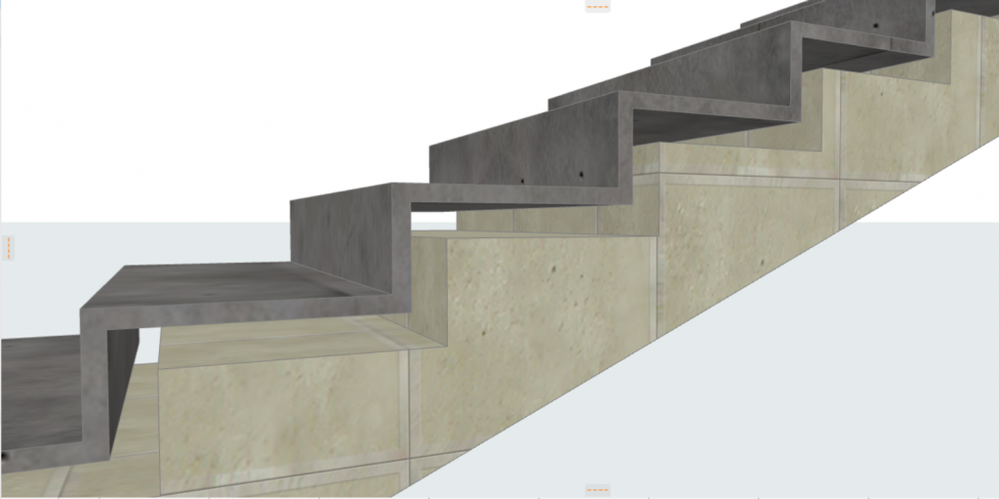 2. Method #2: Create a custom Tread that replaces all Treads and Risers on the whole Stair
- The modeling process is almost the same as when modeling with L-shaped Treads. The difference is that now all Treads and Risers will be used to create the Morph that will be saved as a custom Tread.
- Go to Edit mode and select one Tread and convert it to Morph.
- Then select a Riser and convert it to Morph too.
- Exit Edit mode.
- Unite the two Morphs (Boolean Operations > Union).
- Drag multiple copies of this Morph and place them as if they were the L-shaped Treads in the example above. Now you have several Morphs. (As an alternative solution, you can convert to Morph all Treads and Risers one-by-one.)
- Select all these Morphs and unite them into one large Morph. (You can also create this Morph independently from the Stair if you know the exact dimensions.)
- Save this as a custom Tread (File > Libraries and Objects > Save Selection as > Stair Tread). Make sure you can find the middle of the lowest Tread to place the custom Tread correctly. If necessary, use guidelines before this step to mark the spot to place the Tread to the correct position.
- Select the Stair and enter Edit mode.
- Select all Risers and hide them.
- Select all Treads except the first one and hide them in Step Settings by unticking the checkbox.
- Select the first Tread unhide it using the checkbox in Info Box then change it to the custom Tread that was saved previously.
3. Method #3: Create the Finish of the Stair with a separate Stair

- Finish modeling your Stair with regular terrazzo Treads and Risers just like in Method #1 and #2.
- Drag a copy of this Stair.
- Hide all Treads and Risers of the original Stair in the Info Box by unticking the checkbox:

- Open the Settings dialog of the newly created copy and
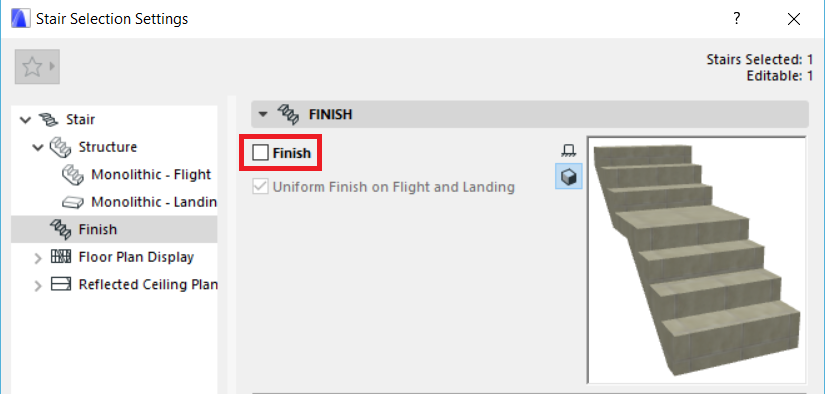
- Turn off the Finish of the Stair in the Settings dialog:

-
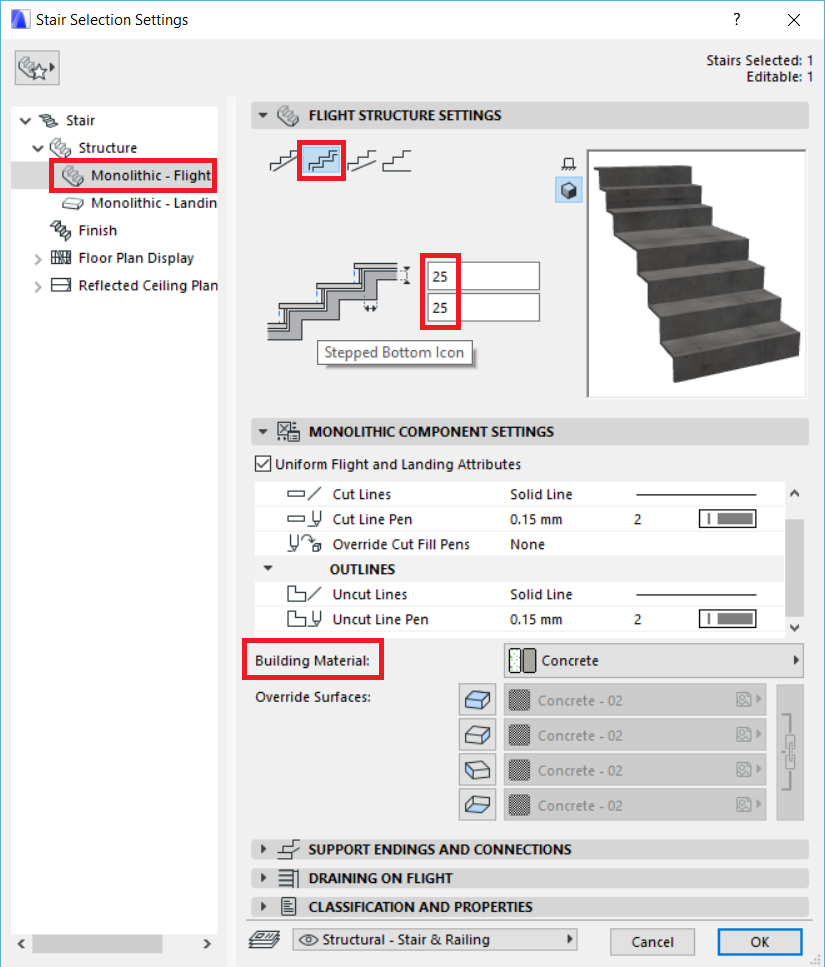
- Change the Support Shape from ‘Smooth Bottom’ to ‘Stepped Bottom’.
- Set the vertical and the horizontal thickness of the Structure – this will be the Finish of the other Stair.
- Select the required Building Material (terrazzo) for the Structure.

- Place the Stair that serves as Finish on top of the Stair that serves as Structure.
- Regarding the Floor Plan View: you need to switch off (hide with layers) one of the stairs in order to only see one floor plan OR if you set background fill for them, they can just sit on top of each other.
Labels:
