- Graphisoft Community (INT)
- :
- Knowledge Base
- :
- Documentation
- :
- Extracting Contour Lines (Isolines) of a Terrain
- Subscribe to RSS Feed
- Mark as New
- Mark as Read
- Bookmark
- Subscribe to Topic
- Printer Friendly Page
- Report Inappropriate Content
Extracting Contour Lines (Isolines) of a Terrain
- Subscribe to RSS Feed
- Mark as New
- Mark as Read
- Bookmark
- Subscribe to Topic
- Printer Friendly Page
- Report Inappropriate Content
on
2019-09-25
12:00 PM
- edited on
2023-05-09
03:04 PM
by
Emoke Csikos
Occasionally you may want to generate a contour map of the terrain of your project. The 3D terrain can be imported from an external source, thus can be an object or a morph in ARCHICAD or can be a mesh created in ARCHICAD. The default Floor Plan representation of these elements usually do not show the contour lines but contain other lines (ridges) you might not need. So you have to find a way to draw the isolines of the terrain with little effort. This article shows you how to do this.

There is a particular object designed to do this job for the architect: the Contour Generator Tool. It utilizes the latest GDL commands to quickly generate contour lines (isolines) of any element in ARCHICAD. This tool can work with all types of ARCHICAD elements (such as mesh, morph, object).
Step 1: Download the tool
Download the tool from BIMcomponents.Step 2: Add the tool to ARCHICAD
The tool is embedded in a Library Container file (.LCF). Add the LCF file to your project in Library Manager.Step 3: Define the element to generate contour lines from
Select the terrain element you want to generate contour lines from and go to File > Libraries and Objects > Save Selection as… > Object… Save it as an object with a name that is easy to recall. This object serves the purpose of the contour line generation.Step 4: Set up Contour Generator Tool
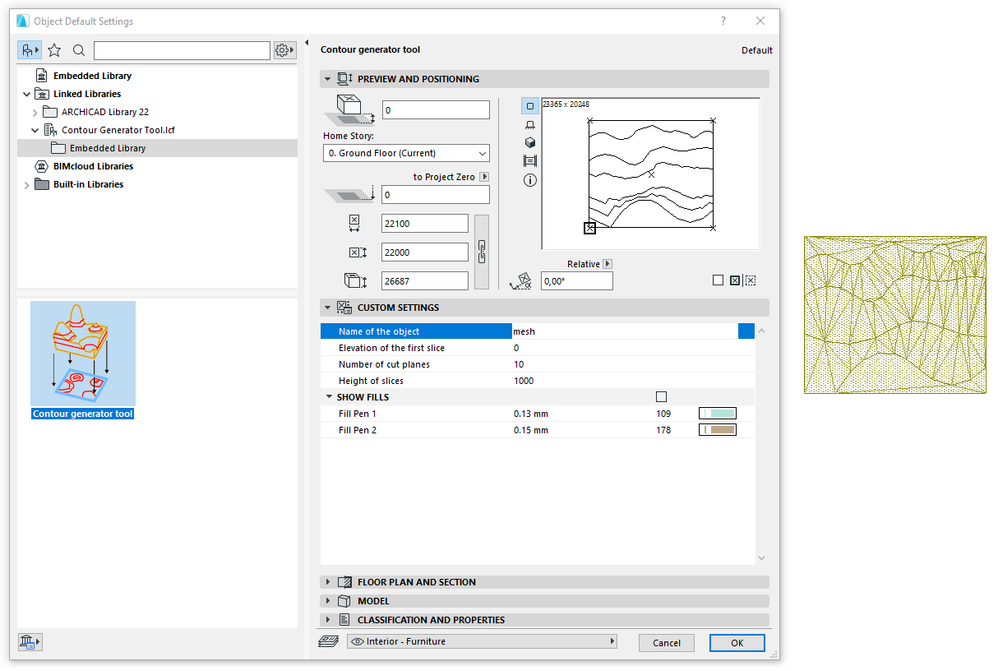
Open Object Default Settings. The Contour Generator Tool is under Linked Libraries > Contour Generator Tool.lcf > Embedded Library

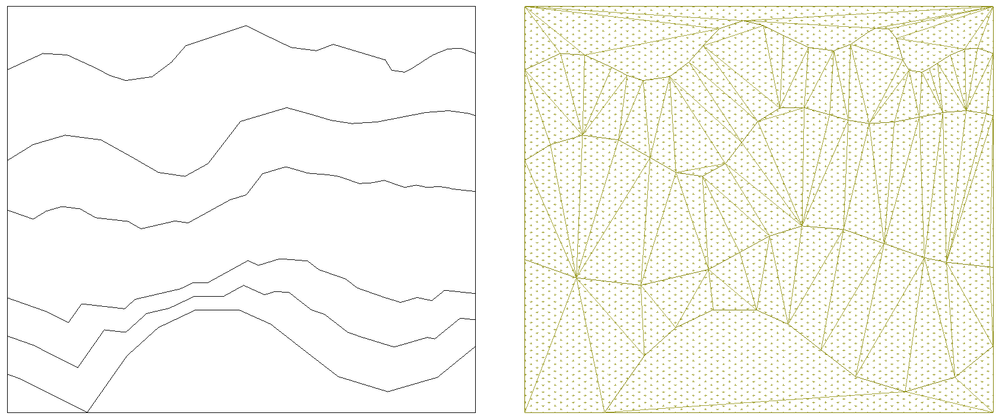
The Contour Generator Tool arranges multiple horizontal cutting planes separated by a certain distance in height to intersect with the chosen object (that has just been saved from the original terrain element). The intersection lines generated by the cut planes form the contour lines of the element at the heights you define in the tool's settings.
Set up the tool according to your design:
- Name of the object: Type here the name of the element saved in Step 3
- Elevation of the first slice: The elevation height of the lowest cut plane
- Number of cut planes: The number of cut planes that will be used to generate the contour lines
- Height of slices: Height between cut planes
- If you want a better visual separation on the contour map, tick Show Fills option to assign two different fills to mark the neighboring segments surrounded by the generated contour lines.
Step 5: Place the generated contour lines
Click on the Floor Plan to place the contour lines generated from the selected element. This step places a new object which is a copy of the original object, but this copy has got the correctly generated contour lines on its top view.

Step 6: Edit the generated lines
After placing the copy of the object with the contour lines, you might want to keep the linework only. To do so, go to Edit > Reshape > Explode into Current View. The contour lines of the object become a group of 2D lines for further editing, while the object still remains on the floor plan if you used the Keep Original Elements After Exploding option. If you no longer want to keep the object, you can untick this checkbox before the explosion. Large and complex elements can slower specific processes of ARCHICAD later, so we recommend only to keep the 2D linework and delete the object after exploding it.
If the object contains fills, exploding it into the current view also extracts all the fills too. You can use Find & Select to select all the fills and store them on a different layer or separate them from the contour lines.
Notes
- The more cut planes you have, the longer the contour line generation process is.
- Once the object is ready and placed with its contour lines, you can still edit it, modify the number of cut planes and the height of the slices. You might need to do this if you are not satisfied with the density of the lines.
- If you apply a high number of cut planes, the setup of the tool (Step 4) might also take a bit longer than what you usually experience when working in similar input fields of tools' settings dialogs.
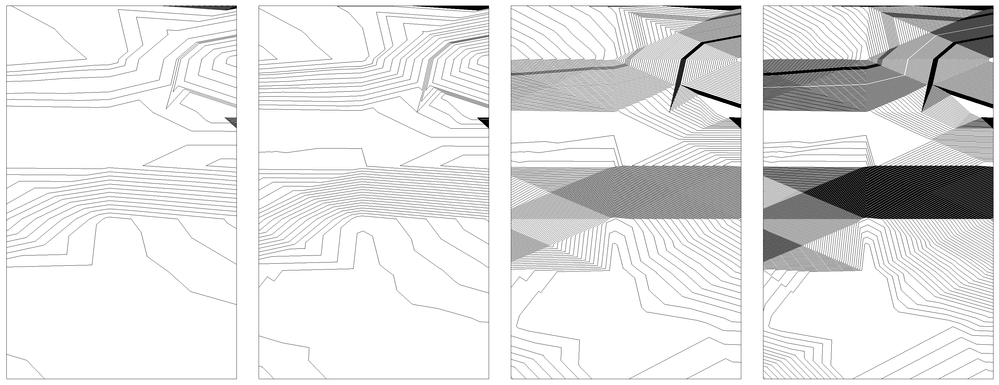
The image below shows the same terrain sliced up using different numbers of cut planes and different heights between them:

If you are interested in the opposite of the workflow described above, and you want to build the 3D terrain based on the 2D linework you have, please read the article How to Create a Terrain with the Mesh Tool Based on a 2D Linework.
