- English
- :
- Knowledge Base
- :
- Modeling
- :
- Modelling my hand-drawn University Project in Arch...
- Subscribe to RSS Feed
- Mark as New
- Mark as Read
- Bookmark
- Subscribe to Topic
- Printer Friendly Page
- Report Inappropriate Content
Modelling my hand-drawn University Project in Archicad
2023-01-03 09:38 AM - edited 2023-01-05 03:29 PM
- Subscribe to RSS Feed
- Mark as New
- Mark as Read
- Bookmark
- Subscribe to Topic
- Printer Friendly Page
- Report Inappropriate Content
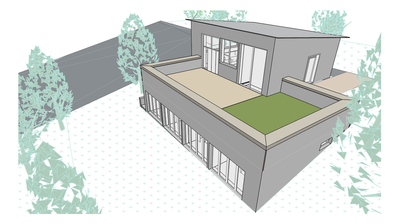
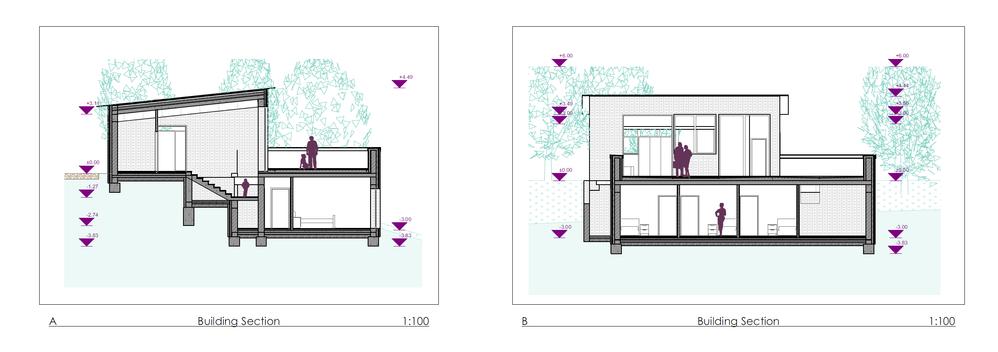
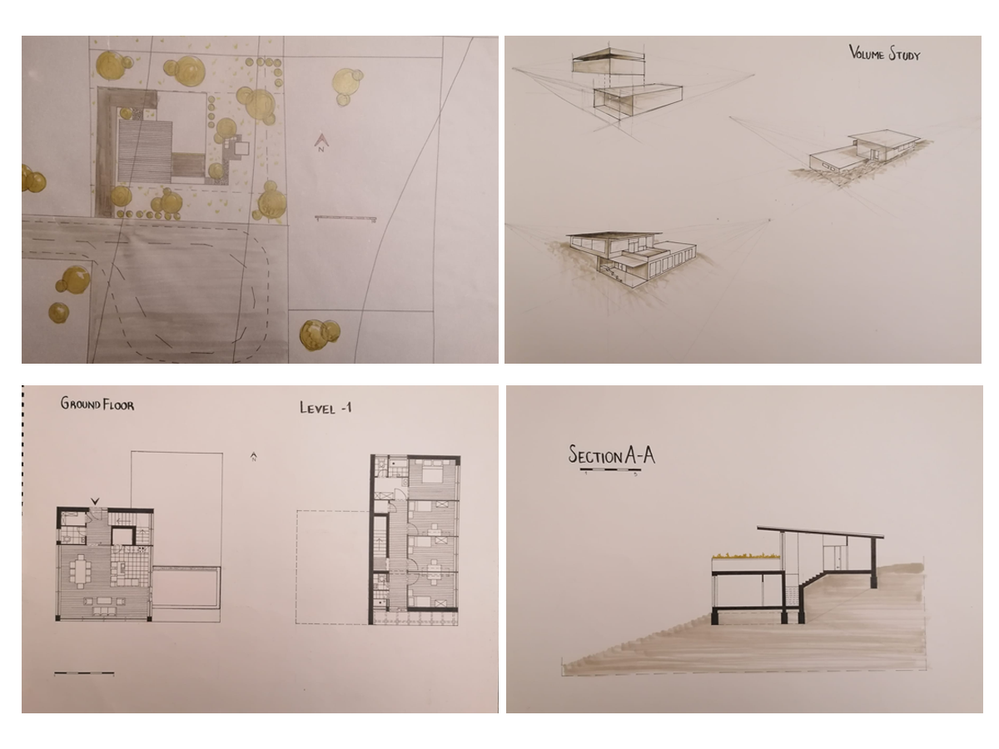
I recently came across a project from my first year as an architecture student, and since the paper model I had is long gone, I thought of modelling it with Archicad so as to keep record of it for my portfolio. The building is a 2-story family house, on a sloped site. What I had at hand was purely hand-drawn documentation as a starting point to recreate my project, which made bringing it digitally to life very interesting.
I will detail below the modelling and documentation workflow, from which you will be able to get some indication and some visual inspiration if you ever find yourself having to perform a similar task, or simply wanting to recreate and experiment on your own projects.
To do this I have divided the process into 5 main phases. At the end, I will give you some tips, and considerations that I think would improve the described workflow.
I think checking this article is worth your while as it explains the Archicad Navigator, and the differences and links between the project map, view map, layout, and publisher sets, so you can better understand the overall BIM workflow:
Archicad Basic Concepts - The Navigator - Graphisoft Community
Phase 1 - Mapping out the project and preparing the file
This stage was mainly for setting up the foundations and systems that I followed throughout the modelling process. Making sure that elements are classified, and some attributes are set early on in the project will save us time and allow us to focus on creating and documenting rather than fixing mistakes as we go along.
- Reviewing the hand-drawn plans
- I had perspective sketches, floorplans, sections, and elevations on a 1:100 scale, as well as a site plan with 1:200 scale. All of these, containing some general dimensions and drawn with ink.
- I had perspective sketches, floorplans, sections, and elevations on a 1:100 scale, as well as a site plan with 1:200 scale. All of these, containing some general dimensions and drawn with ink.
- Preparing the file. (Units, main layers, etc.)
- Under Options>Project Preferences, I set the project's working units, as well as the dimension units, so everything would be consistent as I worked through the phases, including the final architectural plans.
- From the hand-drawn plans, I mapped out the initial layers to sort and place the elements in – This was quite important later on, as it helps you maintain an organized file. This is how you will be able to manipulate the visibility and appearance of all elements, not only to create cleaner documentation, but also create some cool 3D visuals. (Example of layers: Site terrain, site landscaping, landscape trees, structure, floor finishing, roof structure, furniture, interior partitions, etc.).
- Classifying walls and/or construction elements
- By looking at the plans, I came up with different classifications for all the building's walls based on their structural function and material composition. After that, I created composites for them in Archicad.
- Additionally, to creating composites, define under Wall Settings>ID and Categories, whether each wall is an exterior or interior wall, and whether it is load bearing or not. This is useful for creating structural diagrams, exploded axonometric views, or even schedules.
- Mapping the terrain and site.
- In my case, I did not have a scanner for A2 sheets so, I manually checked the measurements on the hand drawn plans and scaled them. After that, I drew the main site and terrain lines in Archicad under a layer called '2D terrain drafting layer'.
- Setting up stories and levels.
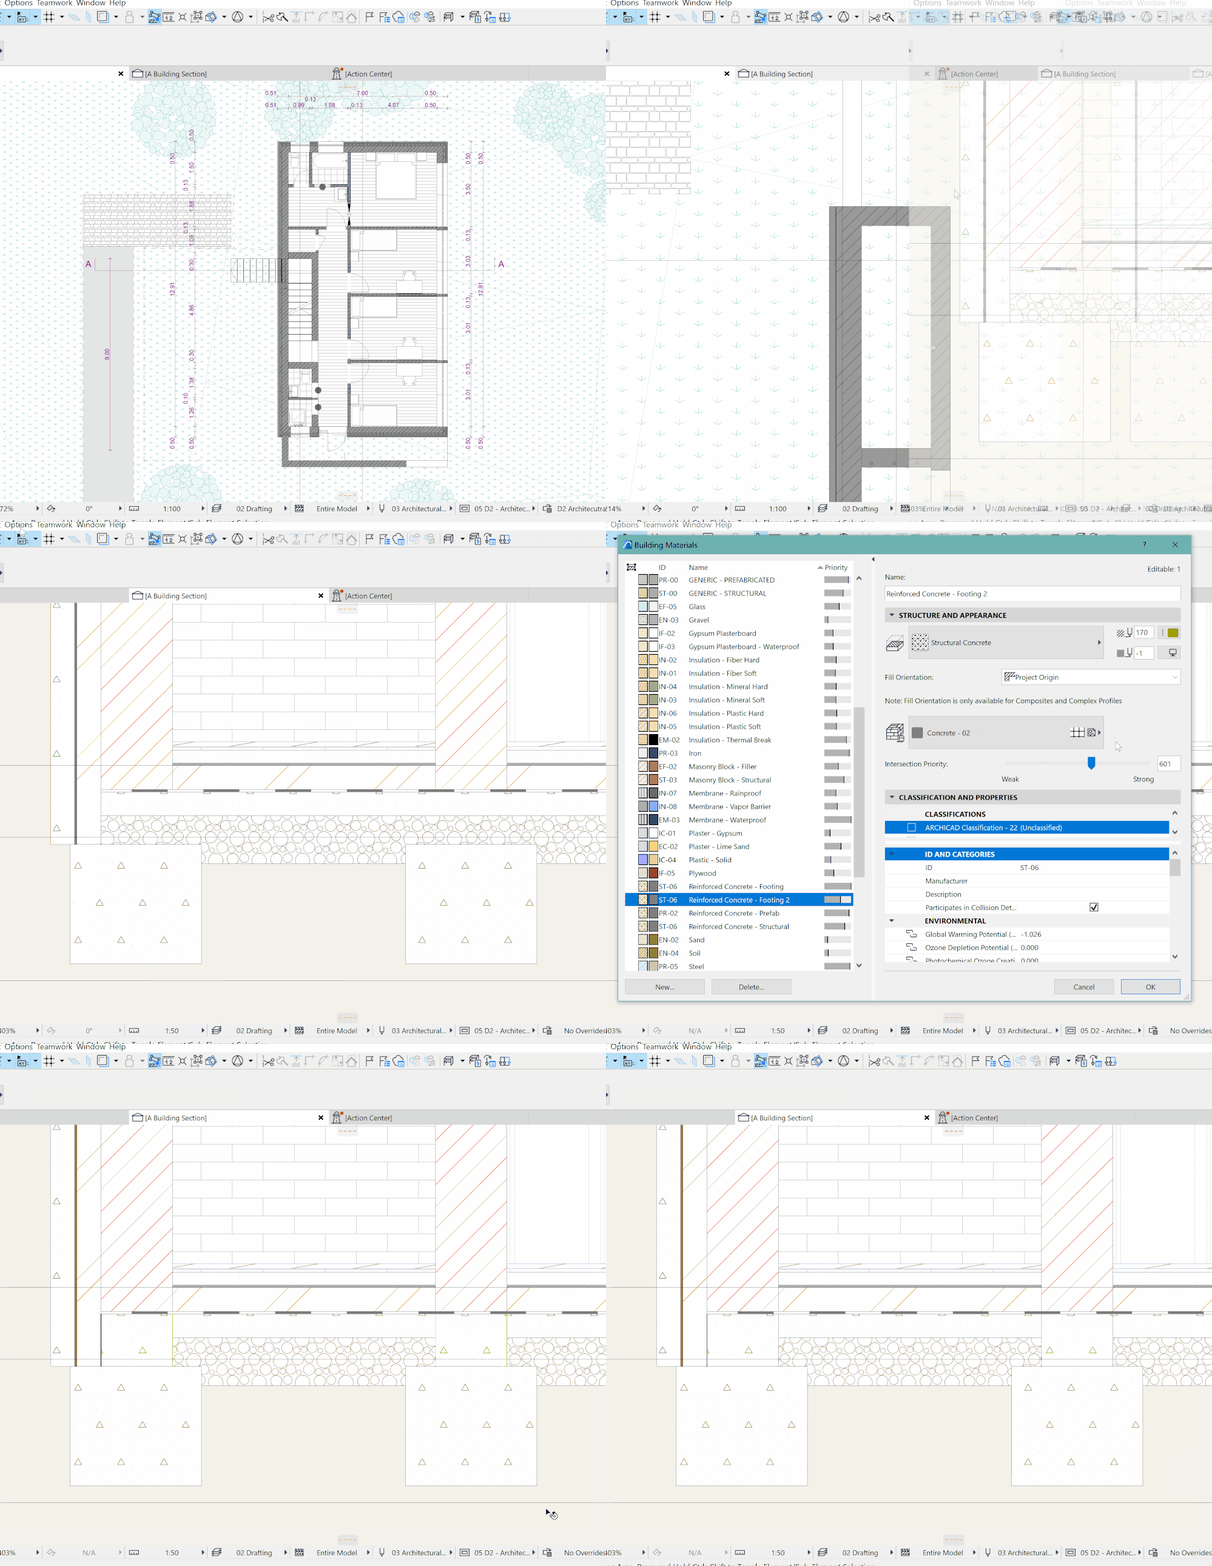
- Deciding how to work with the foundation was tricky, as I needed it to be stepped due to the sloped site. The most logical solution for me was to create home stories for the elements and displace them later by adding different reference levels under the element settings. That way, filtering and handling them would be way easier later on.
- I chose the Ground floor as my main level, from there:
- -1 Story = private area
- +1 Story = inclined roof
- -2 Story = home story for footing
- -3 Story = home story for foundation
Phase 2 - Modelling the main elements
In this part, we will make sure to model the main elements of the building, we can later focus on structural intersections and details. Remember to work within the project map during the initial phases of modelling.
- Modelling terrain
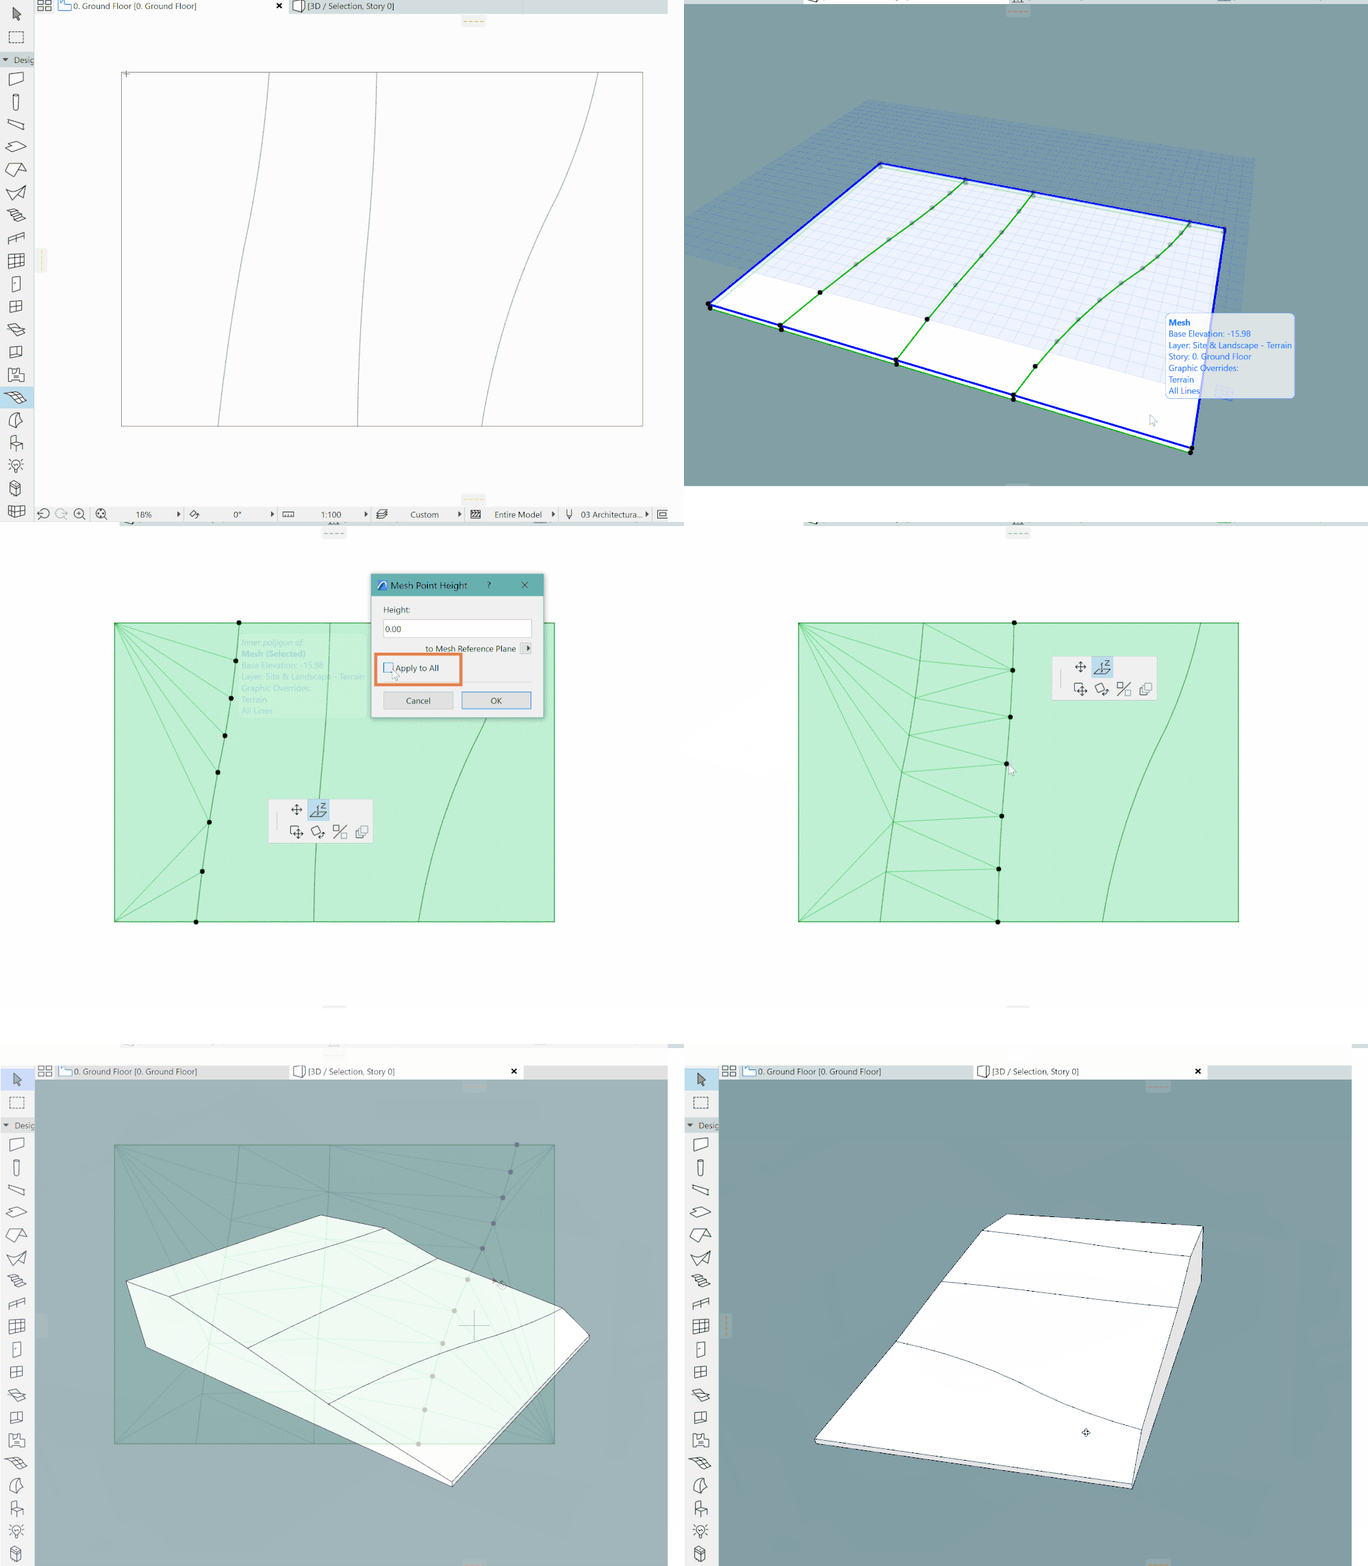
- You can create a mesh, by using the drawn site's outline, with the magic wand tool (hold spacebar). Then, using the magic wand, add the terrain lines to the mesh by clicking on them while holding the spacebar. Afterwards, you can elevate the mesh points accordingly. Find the detailed process here: How to Create a Terrain with the Mesh Tool Based o... - Graphisoft Community
- You can create a mesh, by using the drawn site's outline, with the magic wand tool (hold spacebar). Then, using the magic wand, add the terrain lines to the mesh by clicking on them while holding the spacebar. Afterwards, you can elevate the mesh points accordingly. Find the detailed process here: How to Create a Terrain with the Mesh Tool Based o... - Graphisoft Community
- Modelling exterior walls
- You might already be familiar with this simple process, choose a consistent reference plane to create the walls, and as mentioned above, make sure they are placed on the correct layer and have the correct classifications.
- You can crop the walls later on, when you have created a roof.
- Modelling roof
- The house had a single slope roof, for which I created using the roof tool.
- I created one composite containing the structural layers and insulation, and another one for the roof covering
- Check these articles related to roof modelling tools and strategies:
- Modelling foundation
- I used the wall tool for both the footing and the foundation
- Make sure the elements are in the home story you previously defined for them
- After this you can either raise or lower them to their actual position in the 3D window, the element settings, or dragging them with the help of section views
- Modelling slabs
- Before modelling the slabs, I had to divide the slab types I was going to create in 2 categories: I modelled finishing slabs separately from structural slabs. Due to the house's open plan design for the living areas, there were different materials on the floor finishing that had to be considered.
- Once the materials and composites had been defined, I modelled them with the slab tool.
- Create a staircase
- Depending on the level of detail of your project, using the staircase tool might show undesired information or details on the plans. You can control the appearance of the staircase and the level of detail of almost any element in the ‘Model view options’ panel.
- This article can help you create a ramp using the staircase tool if you need one for your projects: Stair Tool Advanced - How to create a Ramp using t... - Graphisoft Community
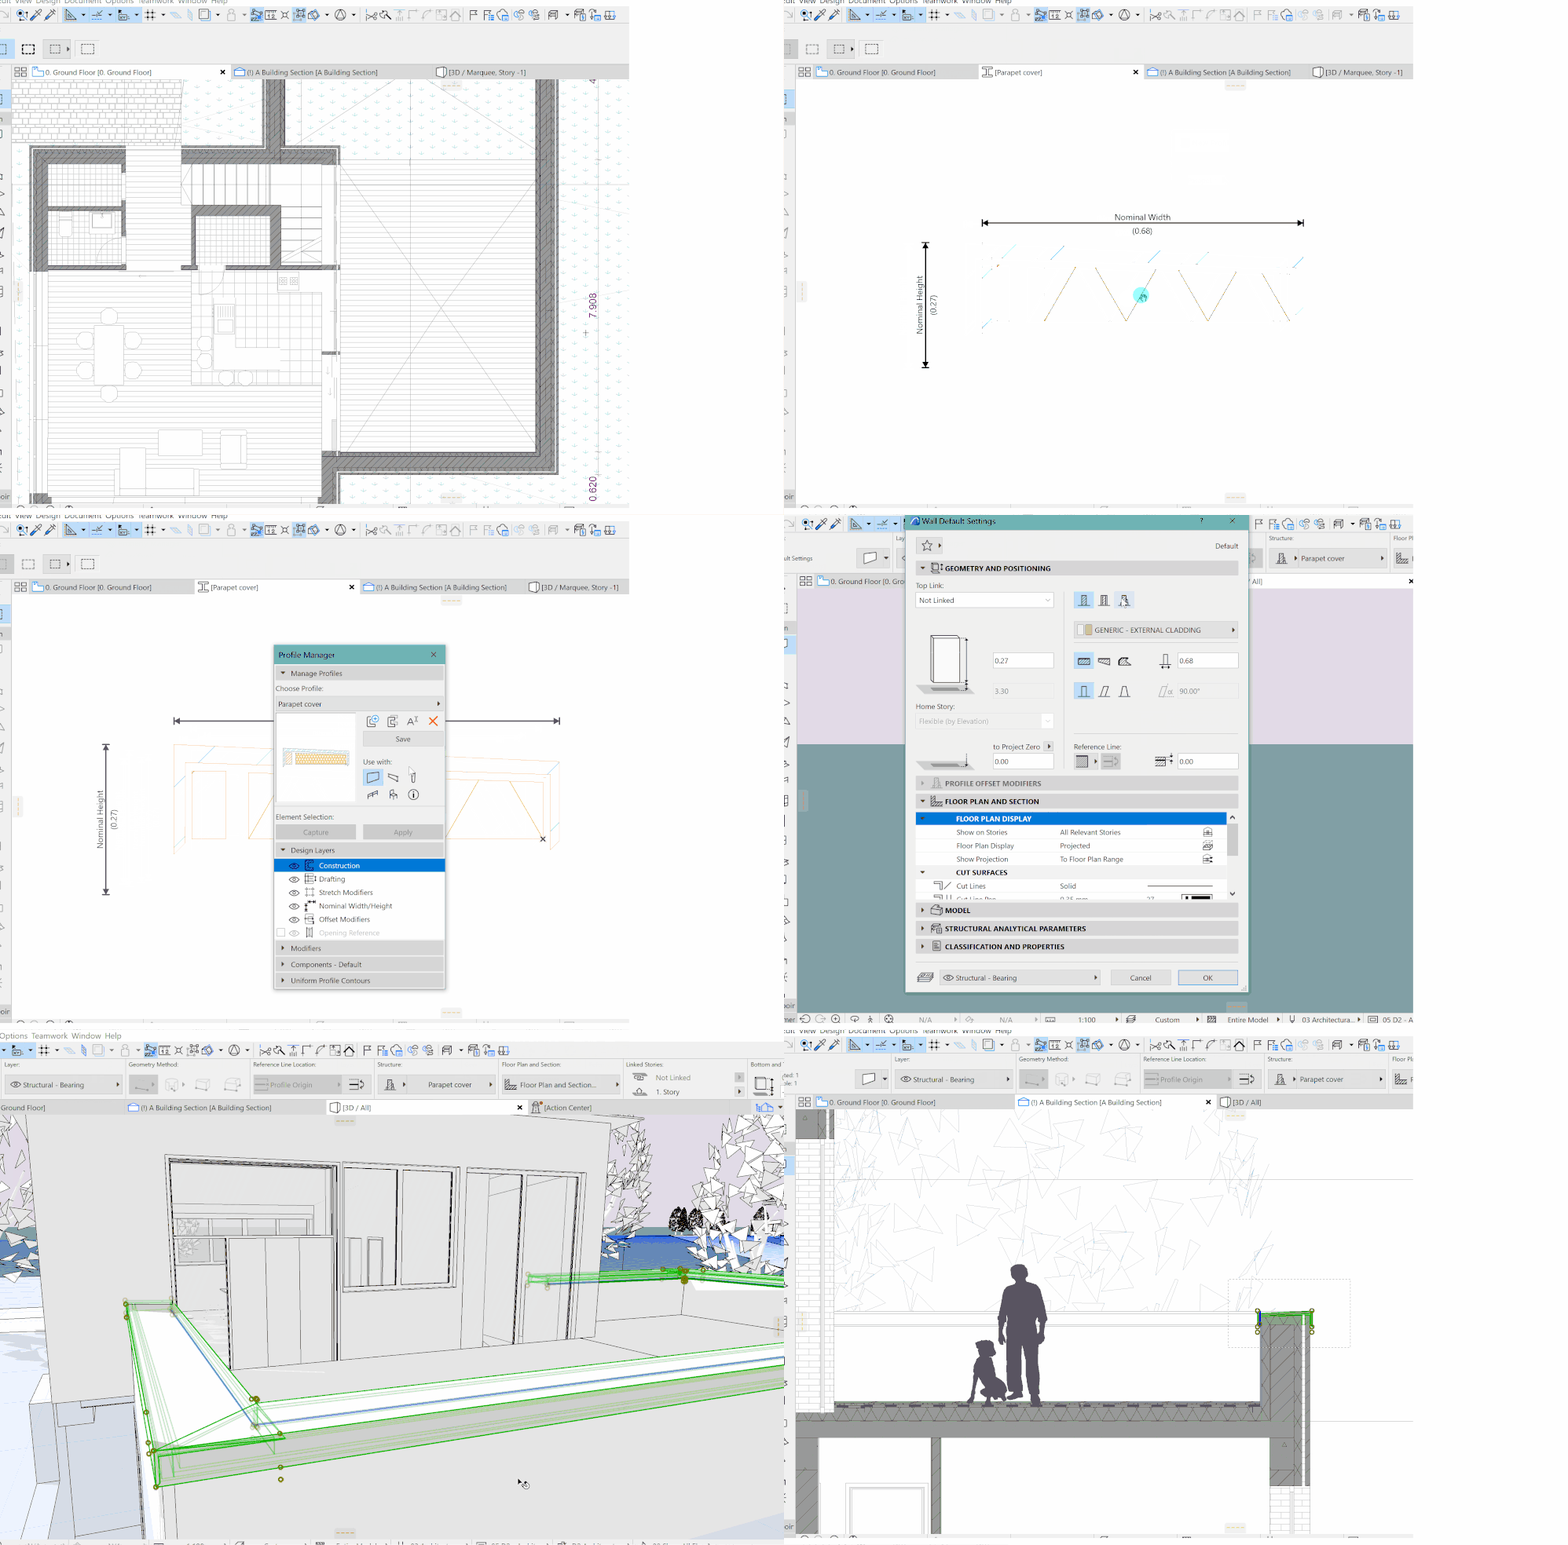
- Adding partition walls and parapet walls for the flat roof/terrace
- Windows, openings, and doors
- Use the corresponding tools for these ones, or experiment with curtain walls.
- You can use the 'Model view options’ panel to control the level of detail for these too (I’ll expand about this one in phase 4)
- And do not worry about individually modifying the line colors for now, we'll handle all of those with graphic overrides later on.
- Beams
- You can control the cross section, elevation, and inclination in the beam tool settings.
Phase 3 - Cleaning Structural Connections and Adding Details
Making sure that your model correctly displays structural connections will give you precise information when creating schedules and performing structural analysis. It will also allow you to obtain better quality section cuts and construction details with minimal 2D intervention.
- Checking the composite intersections on section views.
- To make sure that structural connections were accurate, I had to play around with the attributes of some building materials; specifically, the intersection priorities.
- I even duplicated some materials thus moving the priorities around would not mess other elements, as otherwise many elements shared the same material. For example, I had a concrete material exclusively for the footing, so it would have a high intersection priority, and it would accurately appear on every section.
- Use of complex profiles.
- You can create complex profiles if you have a very particular construction element. You can add some dynamic components to the profile. In this project, for example, I created complex profile for the parapet cover.
- Check this article to know different applications of this handy tool - Creative Uses of Complex Profiles - Graphisoft Community
- Modelling flat roof
- I modelled the structural slab with the slab tool, and I made the slanted drainage system of the flat roof using the roof tool and custom composites.
- Checkout this article, it describes a very similar process to the one I used: How to Create a Flat Top Roof - Graphisoft Community
- Furnishing
- This one is straightforward. Furnish your project with the object library.
- Here you can find examples of sites from which you can download free objects/libraries: Objects for Archicad – Graphisoft
- Checkout this if you want to learn how to create your own objects
Phase 4 - Creating Visual Styles, Diagrams
It is common when we start becoming familiar with the software, to assume that it is not possible to create nice looking diagrams and conceptual visualizations without post-Archicad intervention, but it is! As a student this was the first time that I committed to getting this task done only using Archicad and playing around with the software's tools and here are some things you can consider.
- Think about what type of documentation you will need at the end, make a layout plan, and think about the level of detail you will need to showcase from your model.
- Defining a style for visualizations, if you have a visual idea, you will be able to take what you need from playing around with 3D styles and overrides.
- Explore and play around with 3D Styles
- You can find these in the menu bar under View > 3D View options
- Model View options
- As I briefly mentioned above, you do not need to perform the tedious task of overriding each element’s 2D and 3D display from their settings dialogue box. By opening the Model View options panel, you can create a unique combination of display parameters that you can apply to the model at different times.
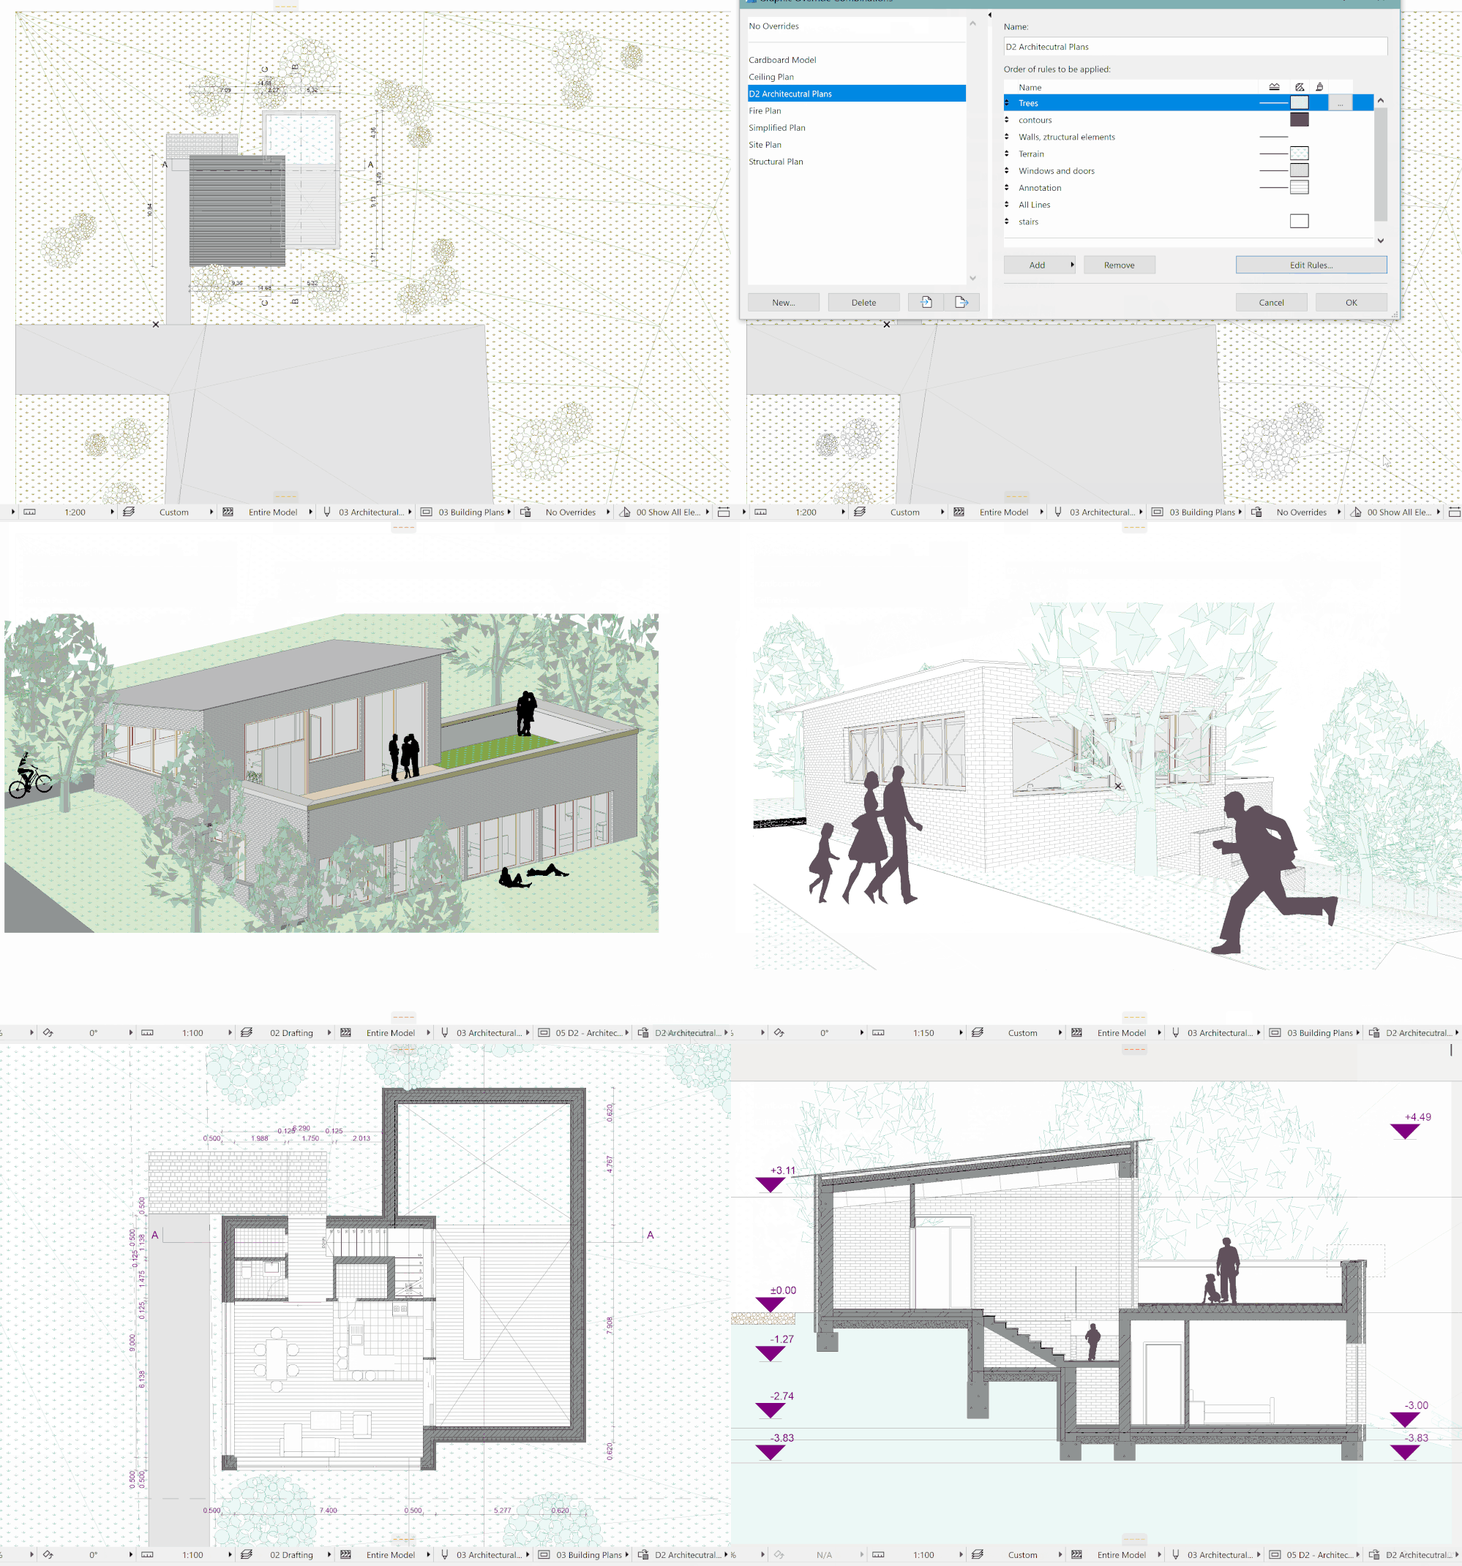
- Playing with Overrides
- At this point, since you have sorted your elements by layers and with their unique composites, materials, and classifications, you will be ready to apply Graphic Overrides to them
- Overrides can be applied to every view of the model
- You can start with a black and white base, and choosing 1 or 2 highlight colors
- In the Override rules, use layers, element names, composites, which you have already defined since the foundation of your project.
- You can create your own colors in the ‘Pen and color’ panel.
- Easier Management of Graphic Override Combinations - Graphisoft Community
- Images as objects for adding silhouettes:
- If like me, you are not a fan of using 3D models of people in your visualizations, you can load silhouettes or illustrations as objects in Archicad to add some life to your project.
- in the default object library there are similar images labeled as 'contours'. You can modify their appearance with colors and fill textures directly in the object settings, but it would be easier for you to override them by setting a rule that isolates their element type and element name containing 'contour'
Phase 5 - Final Documentation
In this section, you will work using the View map and the layout book for the most part.
- Add dynamic annotations and dimensions to your construction documentation views.
- 3D documents.
- You can control display projection of the model, making it perspective or axonometric.
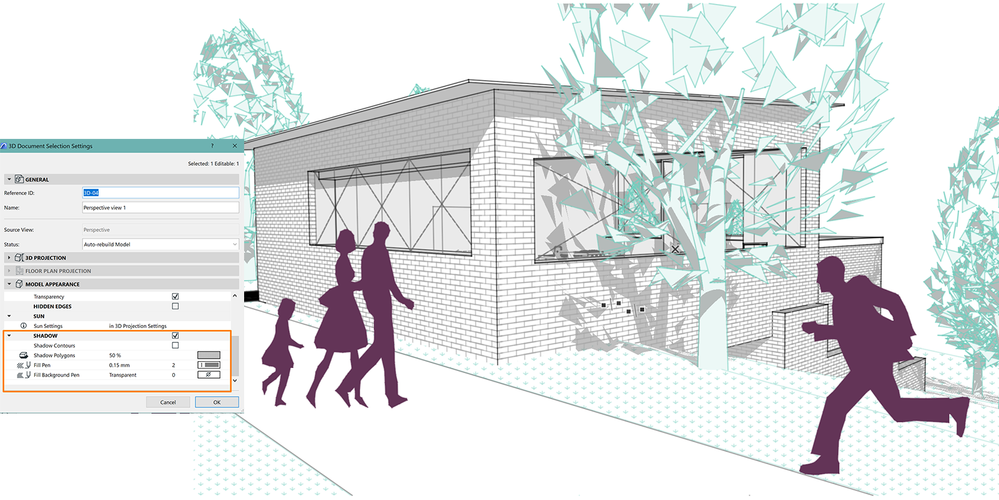
- The 3D document settings allow you to control the appearance of the model, such as surface appearance, textures, lines, etc.
- 3D documents allow you to play with different illustration styles. When you create a 3D document, element attributes are still active. Once you change the document settings to 'drawing', it will turn into a vectorial image that you can edit using 2D tools.
- Making an exploded axonometry:
There are 2 ways you can tackle this one:
- Copying, pasting, and moving around
- Copy your model, and move it far away from your origin, then you can displace the elements as shown In the sequence below.
- The disadvantage of this is that as you will have duplicated elements and your project could get messy. You could put the model copy in different layers, but you would have to manage the override rules carefully.
- The best option might be to simply have a duplicated .pln file of the project to create these model views, and hotlink these to the layouts of the original .pln.
- The Franken-Axonometry
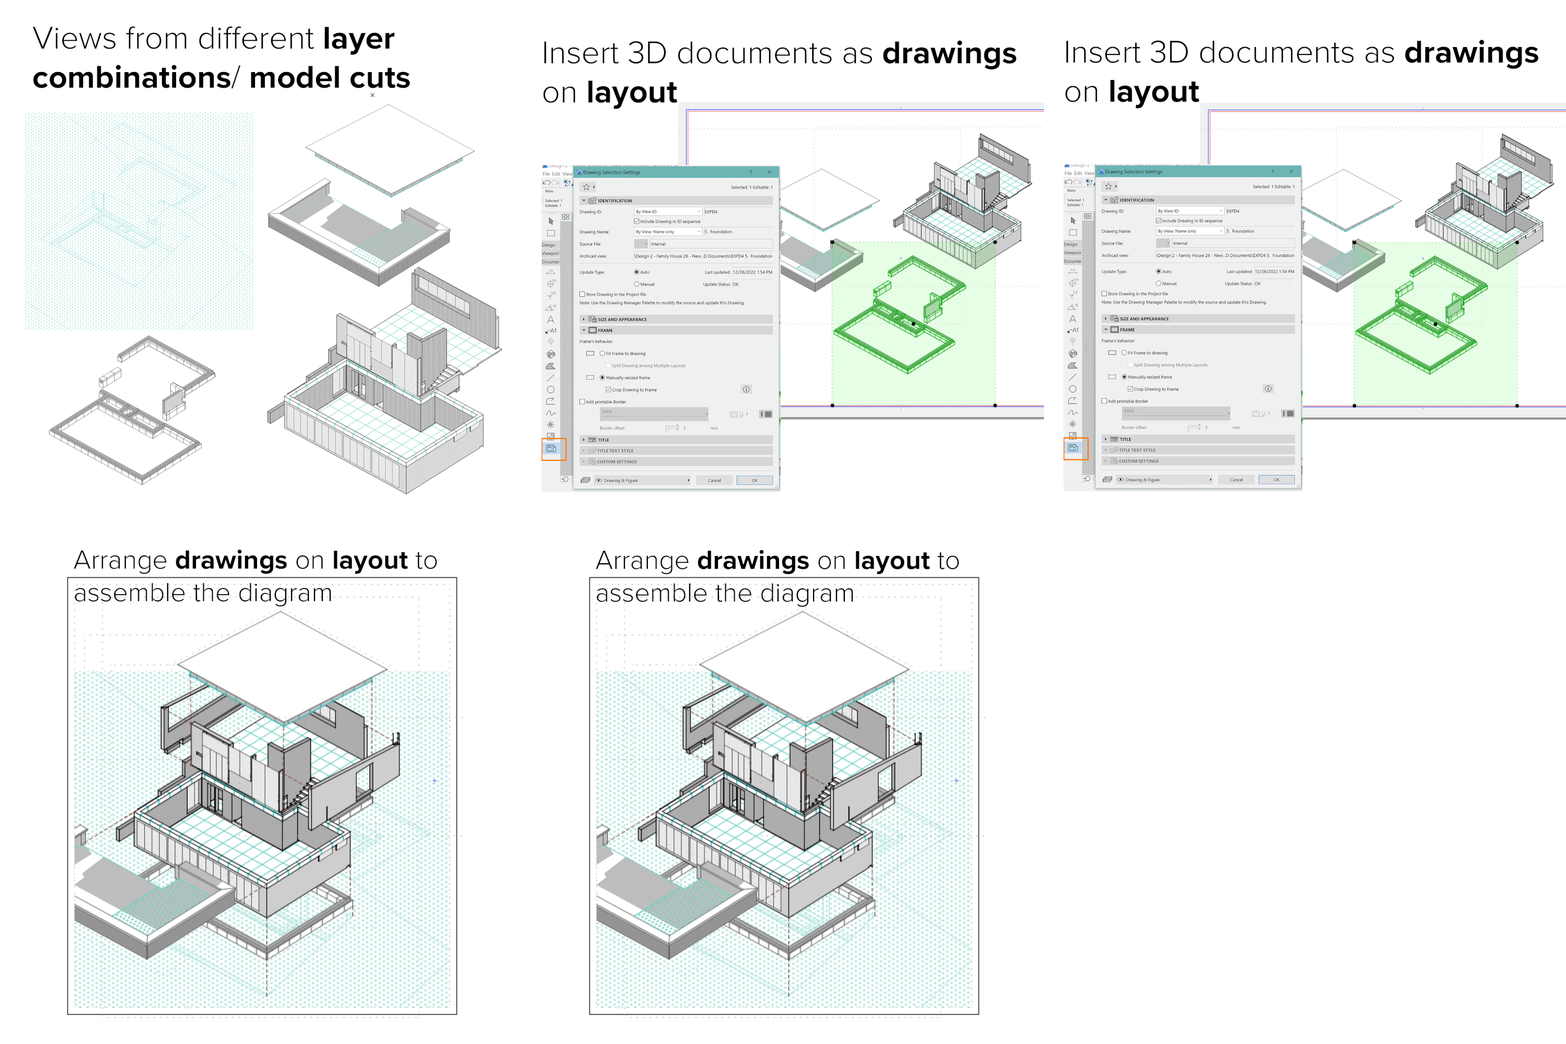
- Make 3D document views using different cut planes and/or layer combinations
- You can also turn off the visibility of certain objects and create a view with the updated desired elements
- Once you have your different cut planes/layer views of the model, insert them in the layouts as a drawing, and assemble them by editing their view frame
- 2D post-production:
- Making your own pen sets and pen types in the ‘Pen and color’ panel - You can create some nice outlines and fills with these. Learn more about these: Pen Sets - Graphisoft Community
- Dimensions and Annotations.
Tips, recommendations + what could I have done differently?
Now that we are done with the workflow, here are some things that stuck out to me during the modelling process, or that I discovered while I was working on the model.
- You can plan out your workflow, and model attributes by defining early-on the final documentation you will need from the start. This is why I would like to emphasize the importance of understanding the Archicad navigator, the correlation between the project map, view map, layout, and publisher sets. Believe me, after years of being a student, working on several projects, and experimenting, I can warn you that it will save you time!
- Regarding Site and Terrain documentation, when dealing with hand-drawn references, scan the plans, and place them as an image on one of the stories in your Archicad file. The image will now be embedded as a figure, which then you can trace by using its home story as a trace reference. Open the Trace and reference palette, and turn on 'figures' as visible, and can also move around the trace reference. The article below demonstrates the tool and this process in detail:
- Tools like the magic wand, eye dropper, offset, and shortcuts will make you more efficient: check out this articles/basic learn courses to get familiar with them. You'll wish you knew them sooner!
- Use favorites to store element parameters that you know are repetitive, or you often reach out for.
- Controlling Shadows in the Sections, and 3D window/3D documents, allows you to create different visualization styles aside from rendering engines. Play with settings and create conceptual or comic book-looking, artsy visuals.
- Find and select tool is your best friend when editing several elements with similar classifications. You can save selection parameters sets to reuse them constantly
- Get familiar with the ‘Model view Options’ and ‘Layer combinations’ panels, by knowing these you can create cleaner views and have a more efficient documentation flow.
- Importing textures: Add life and texture to your model by importing your own textures in the surface attributes, or in view settings.
Understanding the basics, and developing good habits with Archicad, will result in an efficient workflow! You can find great foundation and advanced Archicad courses in the Learn Portal, and if you are a student, some of them are available for free using your Graphisoft ID.
Finally, by studying other projects, you can have references to improve your modelling and techniques. Find some inspiration from other fellow students’ projects over here.
Hope this information was useful!
Feel free to share your own experience with modelling your University projects with Archicad!
