Turn on suggestions
Auto-suggest helps you quickly narrow down your search results by suggesting possible matches as you type.
Showing results for
EN
Turn on suggestions
Auto-suggest helps you quickly narrow down your search results by suggesting possible matches as you type.
Showing results for
- English
- :
- Knowledge Base
- :
- Modeling
- :
- Advanced MORPH texturing techniques
Options
- Subscribe to RSS Feed
- Mark as New
- Mark as Read
- Bookmark
- Subscribe to Topic
- Printer Friendly Page
- Report Inappropriate Content
Advanced MORPH texturing techniques
on
2012-09-10
01:59 PM
- edited on
2021-11-29
02:54 AM
by
Rubia Torres
Options
- Subscribe to RSS Feed
- Mark as New
- Mark as Read
- Bookmark
- Subscribe to Topic
- Printer Friendly Page
- Report Inappropriate Content
Labels:

Texture Mapping
If your Morph uses a material that includes a texture, you can control how that texture is displayed on the Morph surfaces. The Texture Mapping definition (either Box or Planar) is shown in the Model Panel of Morph Selection Settings. When you select an entire Morph, Box mapping is the default and only option. You can activate Planar mapping by including Morph faces into your selection.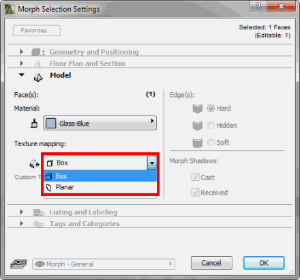
Box Mapping
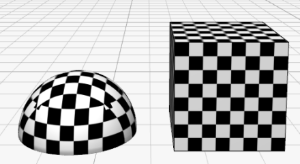
Box mapping means that the pattern is projected onto the Morph from six planes of a square. The default origin of the texture is at Project Zero.- Using the Design/Align 3D Texture/Set Origin command you can click at any point where you want the texture pattern to originate.
- With the Design/Align 3D Texture/Set Direction command you can enter a rotation angle, in the appearing dialog box, or draw a vector to specify its direction.
- You can reset the texture origin to Project Zero by using the Design/Align 3D Texture/Reset command.
Planar Mapping
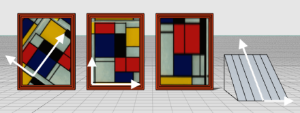
When your selection includes one or more Morph faces, the Texture Mapping control in Morph Selection Settings automatically changes to Planar. Choosing the Design/Align 3D Texture/Set Origin or Align Texture command, an editing square appears on the Morph face, representing a unit of the texture pattern. You can use the pet palette to do one of the following:- Choose the Rotate icon to adjust the texture alignment separately for any face.
- Drag the square and click to a point that represents the origin of the texture pattern on that face.
- Pick or draw a custom editing plane to vary the texture projection onto the selected face.
Making of Mediterranean House
This short tutorial would like to give an overview and general workflow for working with bitmap textures either. You can use textures to further customize your object's appearance or as a workaround to avoid high-polygon models.Preparations
- Plan the final result of your model. Find and stock suitable texture images to match your vision.TIP: You can find textures for free at CGTextures.com for example.
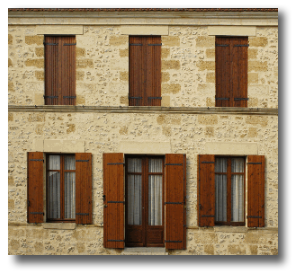
- Prepare your bitmaps with an image editor software. Adjust contrast, colour balance, etc. or crop the unnecessary parts.Tip: You can make a simple image tileable, if you mirror it horizontally and then both parts vertically. Use square shaped textures for a predictable result.
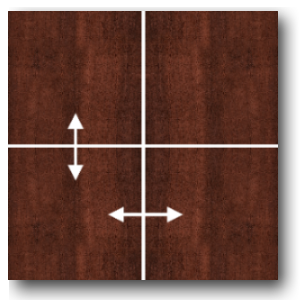
- Save the bitmap to a compressed format, such as .png or .jpeg image.
- Optimize the size of your bitmaps, as large images (<500 kBytes) can slow down your 3D performance. TIP: a size of 512x512 pixels and 72 DPI is a small, but good quality bitmap, both for representation and performance.
Adding Custom Materials
- Create a Folder for all the images (eg. 'maps' or 'textures') and attach them to your project as a Library.
- Open Options menu/Element Attributes/Materials
- Duplicate an Existing Material, that has similar settings as your Custom Material. (eg. if you would like to create a custom Wood material, duplicate one of the Existing ones)
- In the Textures rollout click Search... and select your bitmap from the attached Library.


Adjusting Maps
- Use the Sub-Element Selection to isolate one or more Faces and assign them the Custom Material. At this point, you can scale your bitmap in the Material Settings to match the size of your model.

- Still in Sub-Selection mode enter menu Design/Modify Morph and Set Direction for the image. In the Editing Mode you will have to specify the rotation angle by typing in manually or by drawing a Rotation Vector with the mouse button.
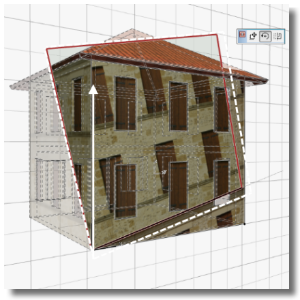
- When the direction is set properly use the Set Origin command from the Design/Modify Morph. In the Editing Mode you can click on a Node or specify the Offset with the mouse button.
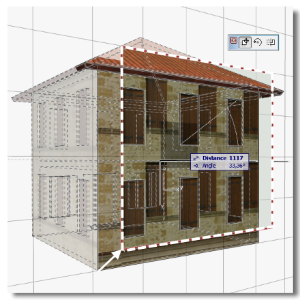
- Use this method for all the necessary faces to finish your design.
