- English
- :
- Knowledge Base
- :
- Visualization
- :
- Graphical Style: Sketch Rendering 2D and 3D
- Subscribe to RSS Feed
- Mark as New
- Mark as Read
- Bookmark
- Subscribe to Topic
- Printer Friendly Page
- Report Inappropriate Content
Graphical Style: Sketch Rendering 2D and 3D
on
2016-10-14
04:32 PM
- edited on
2023-01-24
03:08 PM
by
Giovana Benvenuto
- Subscribe to RSS Feed
- Mark as New
- Mark as Read
- Bookmark
- Subscribe to Topic
- Printer Friendly Page
- Report Inappropriate Content
Sketch Rendering 3D
First Steps
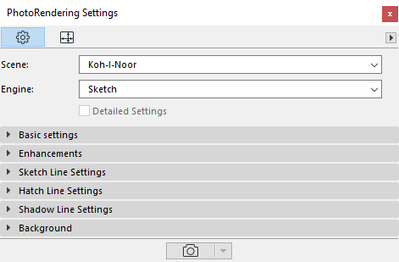
- Select the Sketch Engine in the Document/Creative Imaging/PhotoRendering Settings... dialog in the Engine drop-down menu.
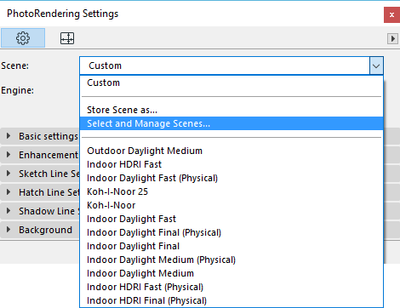
- Choose the desired style by selecting a Scene in the Scene drop-down menu.
- Set further details on the lower parts of the PhotoRendering settings window as discussed below in this article.
- Create a PhotoRendering by hitting the PhotoRender Projection button at the bottom of the PhotoRendering Settings window.
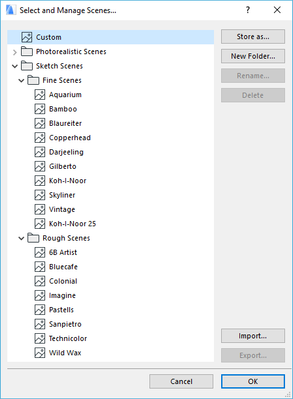
The Sketch Rendering Engine provides a number of preset styles called Scenes with a preset combination of parameter values. You can access all available Scenes via the Select and Manage Scenes... command.
You can customize these Scenes by changing the preset values and overwriting them keeping the original name of the Scene or storing them under a new name.
Basic Settings
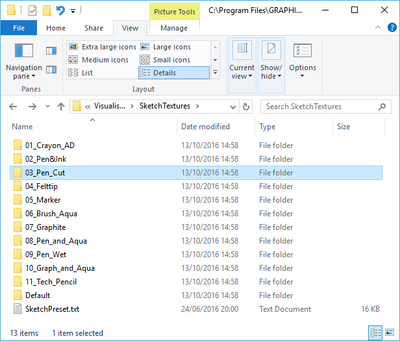
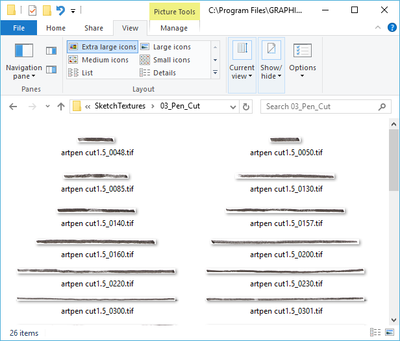
- Line Styles: Each line type is represented by a dedicated folder with a set of bitmap images. These sets can be extended with similar scans of scripts using any graphic device. To get the best sketch effect, it is recommended to scan a large variety of line lengths, as the program will choose randomly among these styles when reproducing lines in the rendering.
Go to the Archicad folder at Add-Ons > Visualization > SketchTextures.
- Line color:
- Custom: Any preferred color can be chosen for monochrome images. The presets suggest traditional black, blue, or tan colors.
- Current element settings: In this case, line color depends on the pen colors of individual model elements. Color images can be generated this way; however, it requires the careful adjustment of pen colors.
- As in Line Style: For the most natural effect, the color of the lines can be determined by the scans’ original colors (graphite pencils, black art pen ink, sepia and peine Gris aquarelles, and carmine.)
- If you check the Show 3D Vectorial Hatching box, the hatch lines (for example brick or tile contours) will be drawn in the rendered image. The properties of the hatch lines can be controlled by the settings of the Hatch Line Settings panel below.
- With Show Vectorial Sun Shadows active, the rendered image will include shaded areas representing sun shadow. The shade lines properties can be set on the Shadow Line Settings panel.
Enhancements
- Antialiasing: Smoothens the lines by picking longer lines from the scans than necessary. In the case of textured line types (e.g. brush, chalk), it is recommended to keep this value low (2 or less), as high values can slow down rendering.
- Air perspective: Similarly to the Fog effect, fades lines further to the viewpoint. Although this effect is not normally done with manual sketching, a light air perspective to a rough wax sketch can be an attractive enhancement and can be made to look especially natural with brush scans.
- Paper roughness can simulate the effects of bumps on scans of real "rough paper". Normally, bumps are generated randomly by the rendering engine; however, for best results, it is advisable to use a background image with a predefined alpha channel for the bumps

NOTE: There have been changes in the handling of Paper Roughness in Archicad 20, so rendering results may be different from what you got in Archicad 19. In general, the lines of the rendered image will be more faded in Archicad 20 than in Archicad 19. You might need to set Paper Roughness accordingly.
- You can find some background images in the Archicad Library 20/[BImg] Background Images 20/Alpha Paper Textures 20 folder. Check the Use background alpha channel box if you use such a background image.
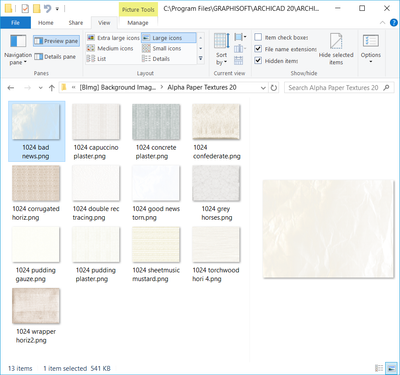
The sketch engine can detect these bumps and fade or erase the sketch lines in this area depending on the settings of the Paper Roughness slider. This setting has no effect if no background image has been scanned with the alpha channel. For samples, go to the Archicad folder and open Archicad Library 20/[BImg] Background Images 20/Alpha Paper Textures 20. Try loading any of these background images from Document > Creative Imaging > Photo rendering Settings > Background. These tend to work well with wax sketches; the effect is less natural if using a brush effect.
Sketch Line Settings
- Thickness: Use a low value to replicate thinner devices (pencil, fine marker). Large values are appropriate for displaying the textures of brush or wax. However, you can experiment with different line settings and try getting interesting results that can be varied for a given line style. For best results, use higher values for Sketch Lines than for Hatch Lines and Shadow Lines.
- Line distortion: Try various values with the chosen line style to achieve the desired effect. Generally, to replicate a pencil stretch you will use a lesser distortion than for a brush, but you can experiment.
- Line Overstretch is set high, the lines will be longer than their counterparts in the Archicad 3D window as if you had been drawing lines that do not connect properly and will cross each other. When the control is set low (below zero), the lines will stop short of reaching one another.
Hatch Lie Settings
The controls on this panel are to set the properties of the hatch lines of the rendered image. If the Show 3D Vectorial Hatching checkbox on the Basic Settings panel is not active, no hatch lines will be drawn and the choices you make here will have no effect whatsoever. The Thickness, Line overstretch and Line distortion controls have the same effects as on the Sketch Line Settings panel. When the Clarify remote area control is set high, the hatch lines in the background will be paler and thinner. This is useful and sometimes even necessary when a hatched surface is viewed from a reduced angle. Without clarifying the remote area the hatch lines would be so dense that they would form a continuous dark area. These settings only take effect if you check the Apply box.
Shadow Line Settings
The controls on this panel set the properties of the shadow-shading lines of the rendered image. If the Show Vectorial Sun Shadows checkbox on the Basic Settings panel is not active, no shadow lines will be shown and the choices you make here will have no effect whatsoever.
- The Thickness, Line overstretch and Line distortion controls have the same effects as they do in the Sketch Line Settings panel.
- Darkness controls the opacity of the shadows. When it is set low, the shade is more transparent.
- Spacing controls the distance between the shadow lines. A high spacing value results in lighter shadows.
Note: The effects of Thickness, Darkness, and Spacing may overlap. For example, if you set a high Thickness value when Spacing is not very high, you will obtain a darker shadow, as if you had increased the Darkness value.
Background
This panel defines the Background image which can be a color or picture for your rendered 3D model. You can make a powerful graphic statement by placing a rendered model against an existing picture as the background. Just turn on the Picture radio button and search for the appropriate picture from the directory dialog box. If you want a different picture for the background, click the Change Picture button. In the Load Image from Library dialog box, you can select another picture.
Sketch Rendering for Floorplan
The Tech Tip July 2002 winner, BertNijs, from Belgium found a way to show Floor Plans in the 3D Window inspired Karl Ottenstein to find a way to create a sketchy look of 2D drawings of Archicad (Floor Plans, Section-Elevation Windows, etc.) The idea came after a user wanted to be able to achieve results similar to those created by the Sketch Rendering Engine of Archicad on the Floor Plan. Some additional data need to be taken into consideration to achieve a correct result. Basically what we need is to have an Archicad Library Object at the end which contains 2D lines in its 2D View and real 3D lines in its 3D View. Several steps are needed to achieve this, but here is how to do it:
Step 1
First of all, you have to adjust the layers in your plan so that you only see the lines that you want to see later in 3D. Hint: draw a rectangle around the extent of your project - this will come in very handy later when resizing the object to your floor plan!
Step 2
Place all the plans you would like to create Sketch about on Layouts.
Step 3
Publish or save the correctly resized and scaled Drawings to DWG or DXF formats. In the DXF-DWG Translation Setup dialog (File/File Special) you can add the export/import options like Pens and Colors, Penweights, or Line types. (You'll recognize that everything is broken down into the most primitive elements (lines, arcs, hotspots). This is necessary in order to see them later in 3D.) Be very careful about the Drawing units at this save operation, the following chart contains the needed conversation values.
Step 4
| Now open this DWG file in Archicad. Make sure to set the drawing scale back so that 1 drawing unit in AutoCAD equals 1 meter in Archicad. So if you did the previous step correctly, the DWG file is now in the correct scale and you don't need to bother with scaling when saving and opening the DWG file. Now in Archicad, you might want to do any modifications needed before again saving it as DWG. For example, you might want to move the whole drawing closer to the ProjectOrigin or delete unnecessary HotSpots that have been generated. | 
|
Step 5
Save this file as a DWG file. You can also overwrite the previous DWG file saved from Layout. Use the settings similar to your previous DWG save.
Step 6
Open this file as a Library Object in ARCHICAD. (File/ Libraries and Objects/ Open Object...) Browse for a Folder where you have saved the DWG into. In the appearing dialog, you can check the layers you want to import into ARCHICAD With the Save command or by closing the dialog save the Library Object under a new name into the Embedded Library or into a selected folder on your computer. Now you can select the Library Object to place it on the Floor Plan. Make sure to check the Enable Object Linetypes and Pens checkboxes are selected in the Object Selection Settings Dialog so they will appear in the same colors.
Step 7
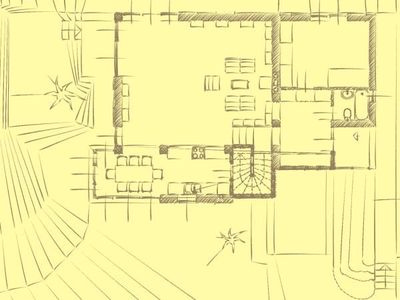
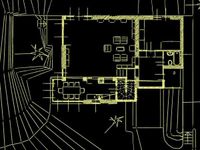
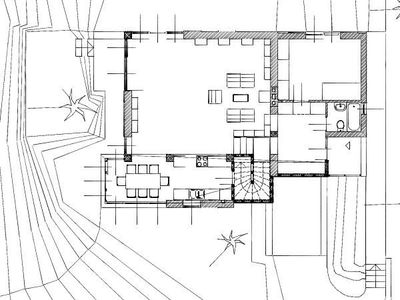
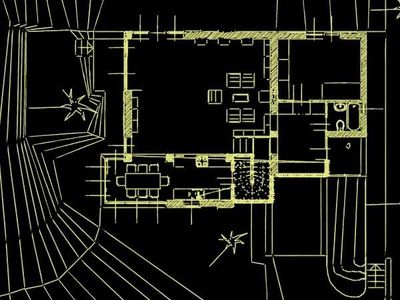
Select the Object. Go to the 3D Projection Settings dialog box. The below picture shows how the Object will look in 3D in isometric projection. You should select Top View so it will look like a 2D view in the 3D Window. Go to the PhotoRendering Settings dialog box. Select the Sketch Rendering Engine and click the Options... button to enter its Subdialog where you can select and customize the kind of Sketch Rendering you want to apply. Also, set the desired PhotoRendering size and background colors for your Rendering. You may also find the file " SketchPreset .txt" located in the "Add-Ons / Visualisation / Sketch Textures" folder. You can copy and paste a whole Preset into another portion of the file and modify it to your preferences or save in it a Sketch setting set that proved great-looking for you. Make sure to create a copy of this file before you start modifying it. Here are some final sketch results from a Floor Plan of another Project:
 Important Note
When selecting the Sketch style to be used, please make sure that you set the "Air perspective" value under the "Enhancements" section to 0%. Any other value will not give correct results. The reason is that when you use a Parallel projection (such as Top View) the sketch rendering engine doesn't have information about how far the 3D data is from the viewpoint. It is as if it was at an infinite distance therefore any Air perspective value will make the lines disappear in the Sketch rendering.
