- English
- :
- Knowledge Base
- :
- Modeling
- :
- Ramp Parapet with Morph Tool
- Subscribe to RSS Feed
- Mark as New
- Mark as Read
- Bookmark
- Subscribe to Topic
- Printer Friendly Page
- Report Inappropriate Content
Ramp Parapet with Morph Tool
on 2022-04-26 12:22 PM
- Subscribe to RSS Feed
- Mark as New
- Mark as Read
- Bookmark
- Subscribe to Topic
- Printer Friendly Page
- Report Inappropriate Content
Place a Ramp Object
I felt it is good to share some software specific tips and tricks in between my posts focusing on interoperability. In this post I am sharing a tip on how to create guard walls (parapets) along the edge of a curved ramp using Morph Tool and Solid Element Operation.
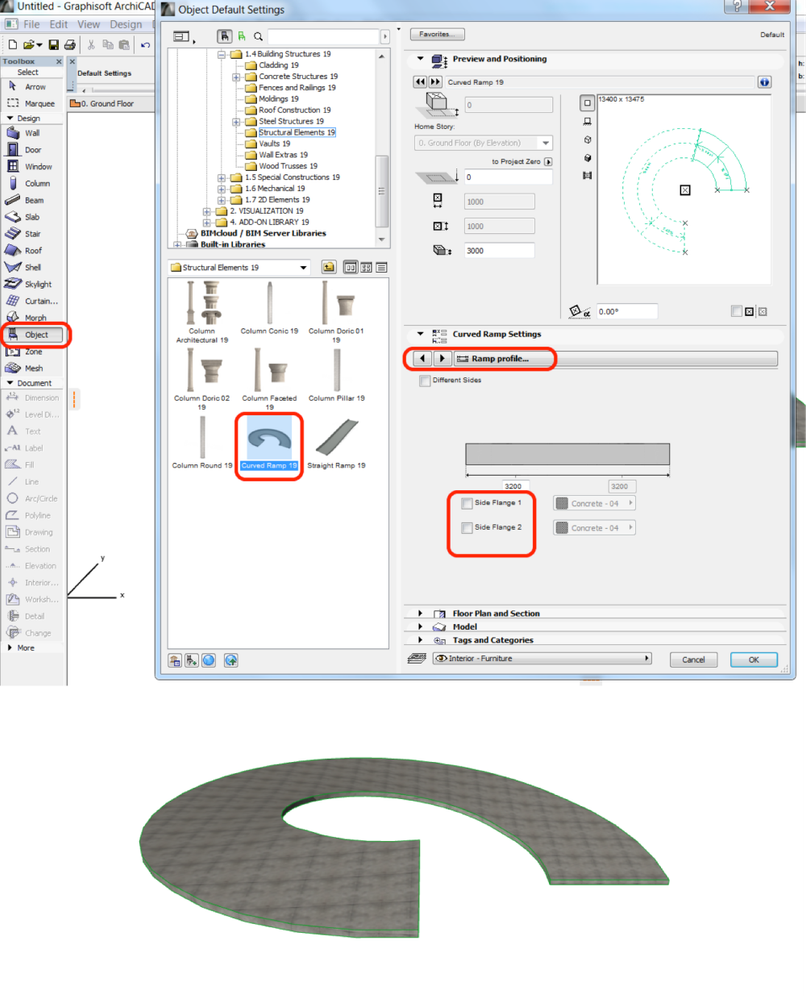
Place a ramp object with the settings as shown in the below image and switch to 3D window (press F5).
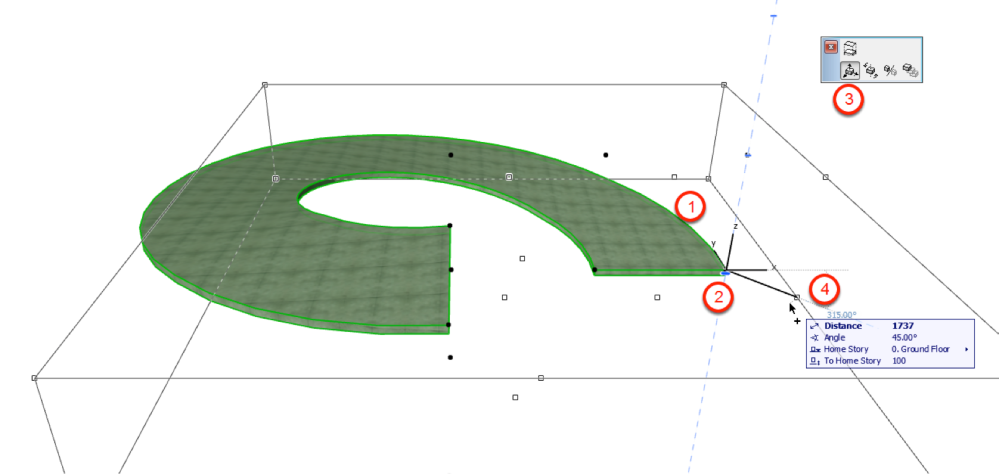
Make a copy of Ramp
- Select the ramp,
- Click and hold on one of the node,
- Choose Move command from the Pet Palette,
- Press Ctrl/Cmd key, click on the same node to make a duplicate ramp.
Model a Slab to Cut
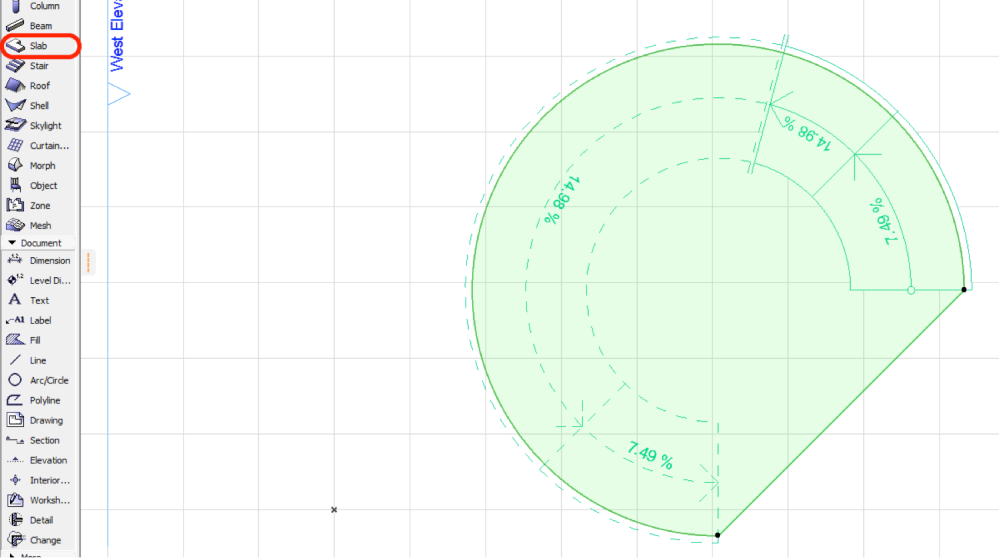
Switch back to floor plan (press F2), model a slab that can be used later to cut the ramp we copied in the previous step.
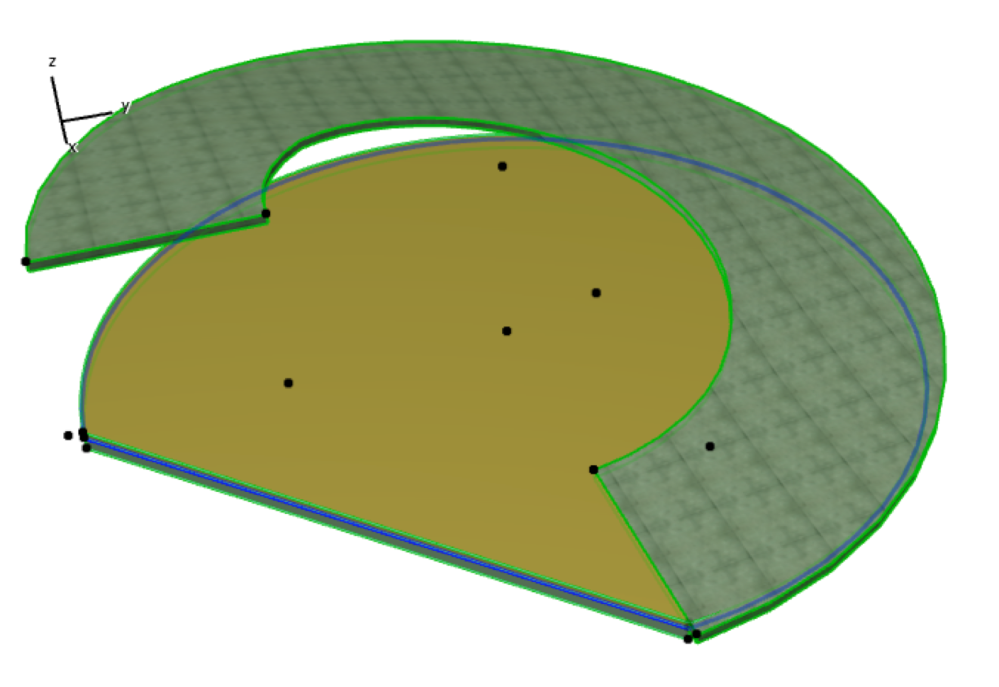
Switch back to 3D, select the ramp and slab. Press F5 to isolate them.
Solid Element Operations…
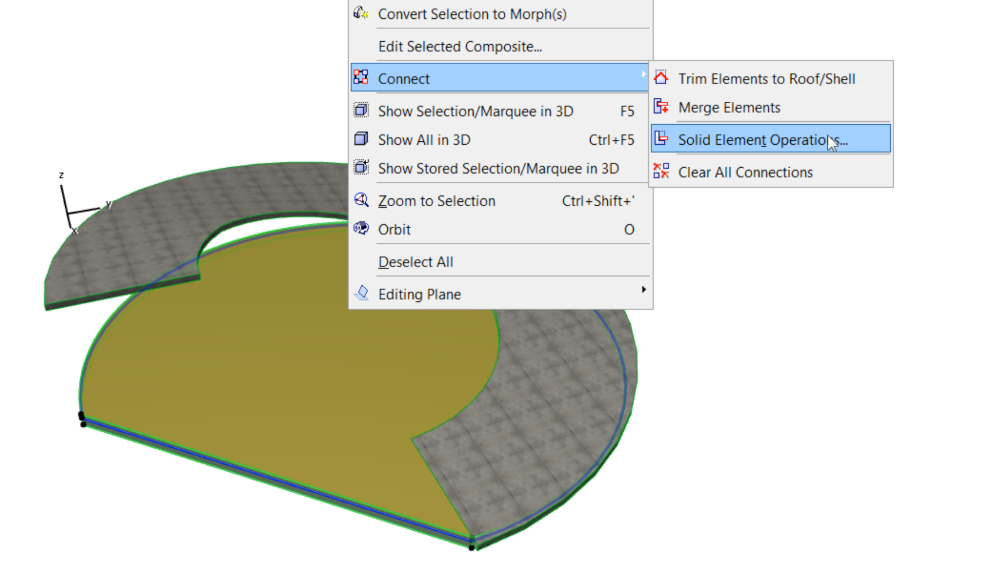
Select the slab, right click, and choose Connect > Solid Element Operations…
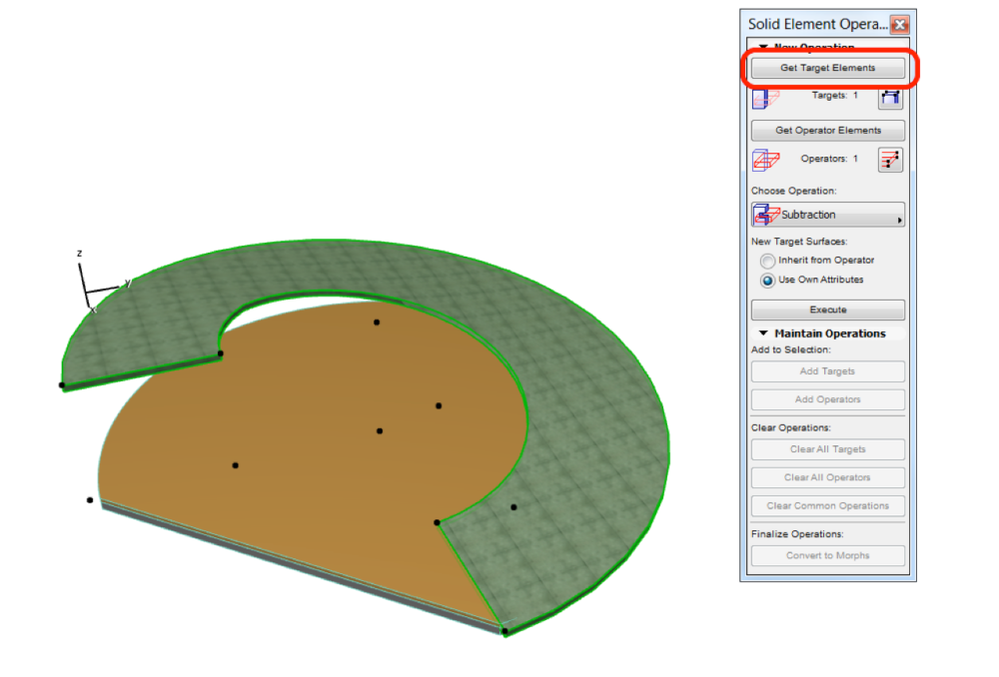
Select the slab and choose Get Operator Elements
Select the ramp and choose Get Target Elements
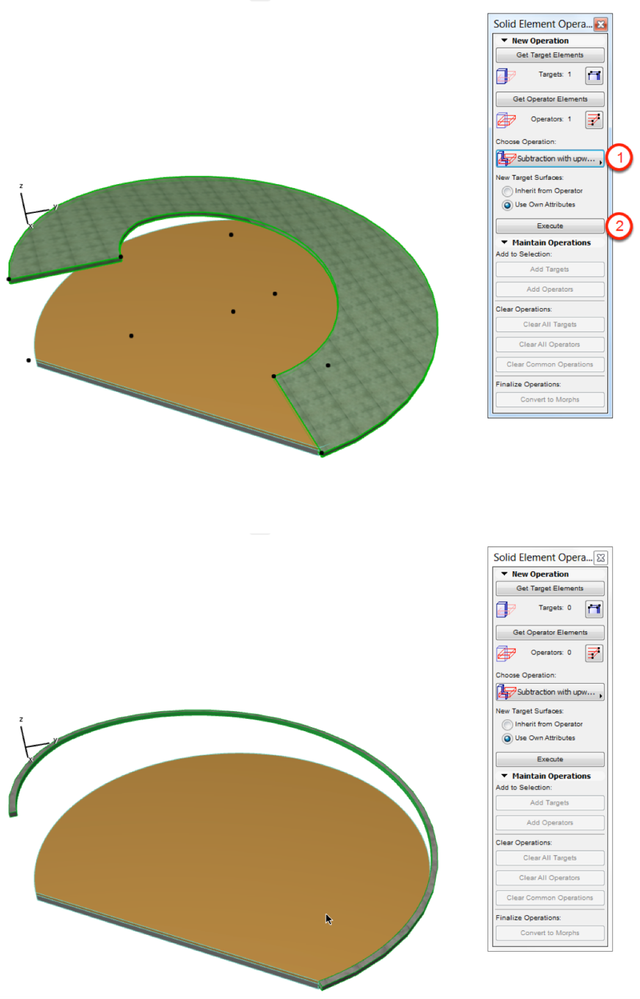
- Choose Subtraction with upward extrusion and
- Click Execute. Result is shown below. Select the ramp and press F5 to isolate it.
Convert Ramp to Morph
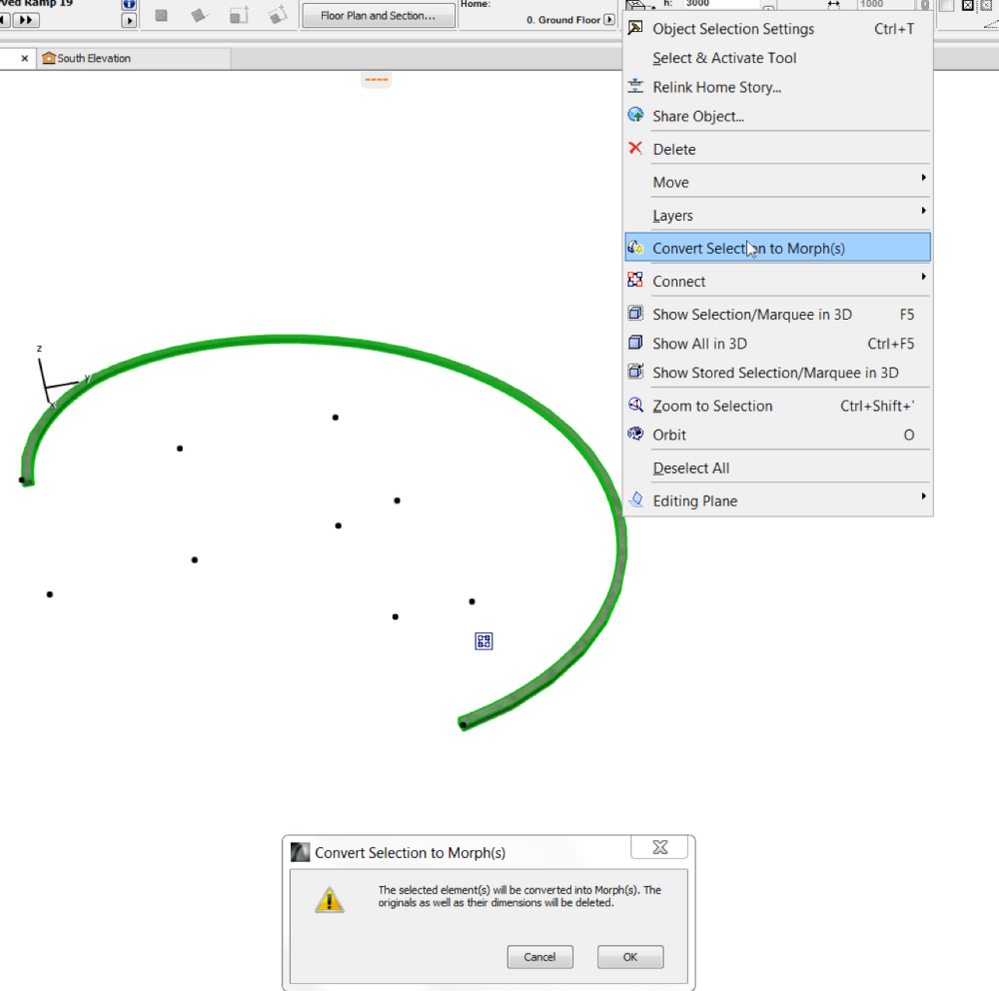
Select the ramp, right click and choose Convert Selection to Morph(s). Click OK on the popup dialog to confirm the conversion.
Modification of Morph
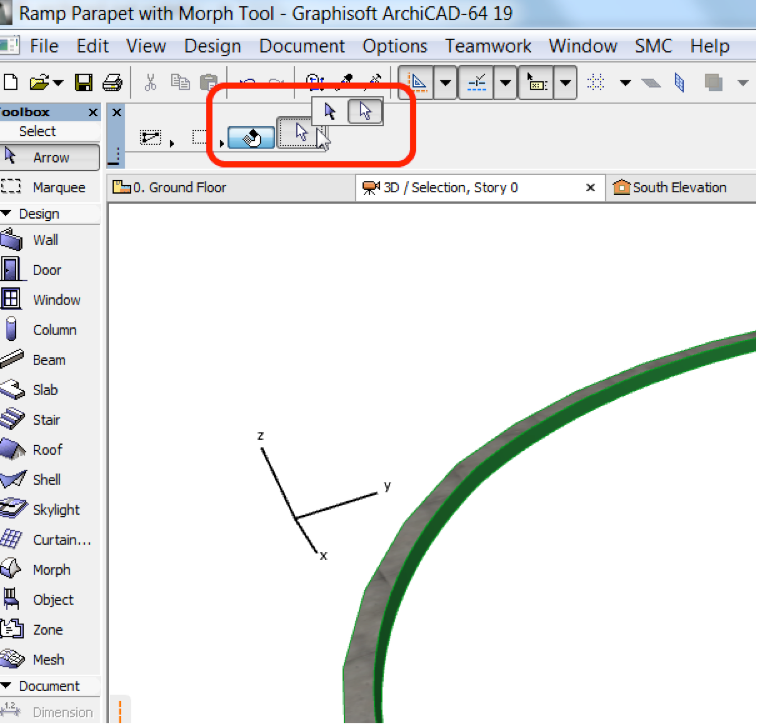
Change the selection type to sub-element.
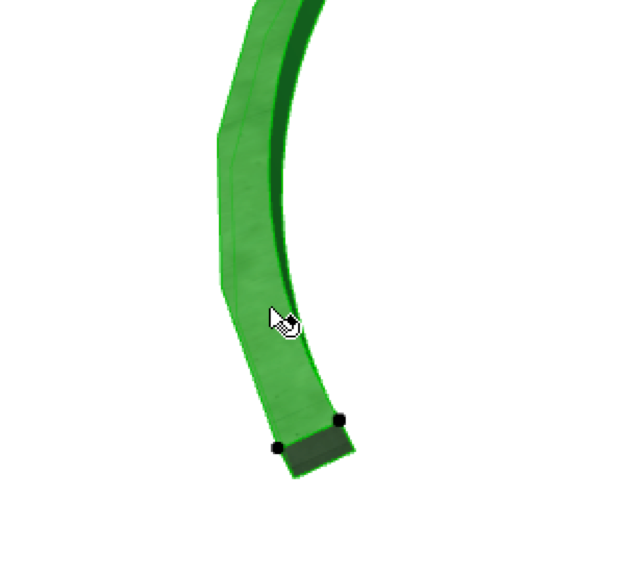
Pick the top surface of the morph.
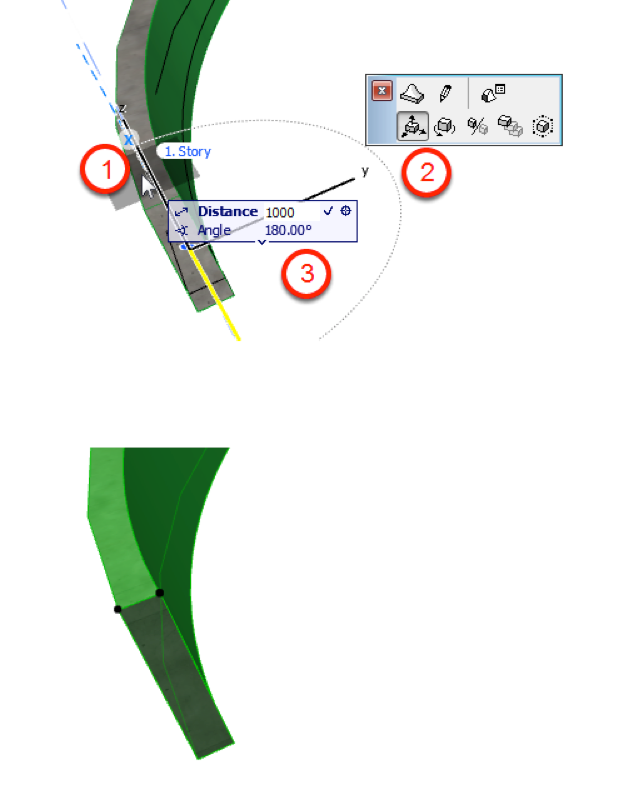
- Click and hold on the top surface,
- Choose move tool and move along Z axis and
- Key in the parapet height (1000) while keeping the mouse align to Z axis
Repeat the steps for the bottom surface as well. This is to make sure the parapet is on top of the ramp.
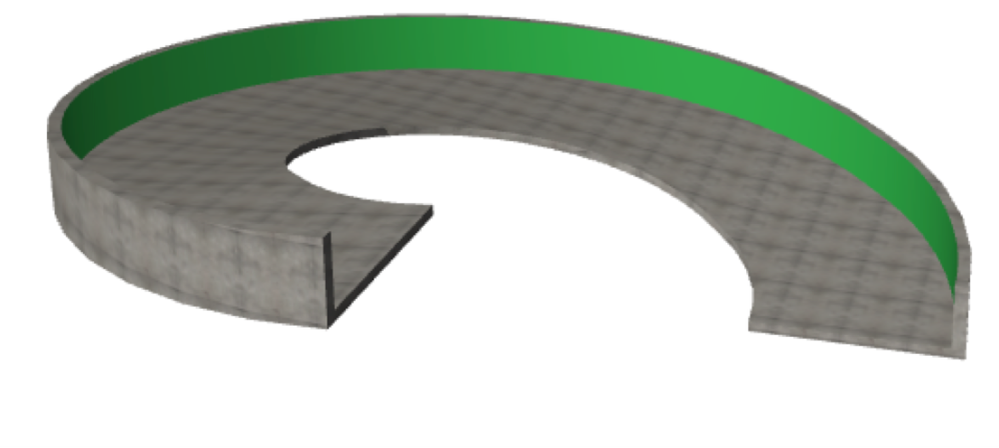
Our parapet is completed, if required you can repeat the same for the inner side of the ramp as well.
See you with another blog post soon.
