Turn on suggestions
Auto-suggest helps you quickly narrow down your search results by suggesting possible matches as you type.
Showing results for
Turn on suggestions
Auto-suggest helps you quickly narrow down your search results by suggesting possible matches as you type.
Showing results for
- Graphisoft Community (INT)
- :
- Knowledge Base
- :
- Documentation
- :
- How to convey data into visual information using G...
Options
- Subscribe to RSS Feed
- Mark as New
- Mark as Read
- Bookmark
- Subscribe to Topic
- Printer Friendly Page
- Report Inappropriate Content
How to convey data into visual information using Graphic Override
Graphisoft Alumni
Options
- Subscribe to RSS Feed
- Mark as New
- Mark as Read
- Bookmark
- Subscribe to Topic
- Printer Friendly Page
- Report Inappropriate Content
on
2018-07-03
09:34 AM
- edited on
2021-11-29
12:56 AM
by
Rubia Torres
In ARCHICAD we have to handle a lot of data and sometimes it gets complex to analyse and understand all the information embedded in the model. Some of these are non-visual information, such as a parameter or a property related to a construction element, object or zone. These are searchable and we can also schedule them. Element IDs, dimensions or serial numbers would be good examples of non-visual information since you can see the element, but, you cannot presume the information enclosed to it, just by looking at it.
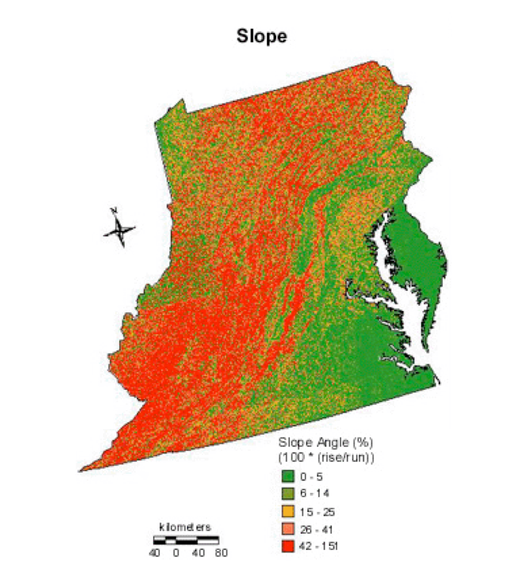
So, how can we turn these data into something easier to control and better to communicate? For example, how about if we could color each part of a terrain with different colors varying from its range of slope angles, therefore we could read better the landscaping of the terrain under study and we could decide more effectively some decisions on a conceptual build design with less effort?
In this article, I will explain how to override non-visual information into an easy to understand drawing, using an ARCHICAD feature called Graphic Override. For this purpose, we will use a simple and practical example. We got a terrain/site to work on in this new project which is very uneven and with some hard slope angles. The conceptual design needs to be accurate, to make the best of the site. Therefore, it would be very helpful if we could clearly see where the steep areas are.
How about if we could have each part of this terrain, that has a different slope, in a different colour? Can we have the terrain coloured according to the range of different slope angles, like this?
The answer is: Yes, we can! Ok, since we understood what we want to achieve, let’s set up a clear workflow and the required tools.
Workflow and tools
For this workflow, the main feature will be the Graphic Override.
Graphic Override tool was introduced in ARCHICAD 20. This tool allows you to change some graphical representations like colours, lines and fills of any element overriding its 2D and 3D settings, controlling it with a set of combined rules, that organises elements by criteria defined by the user. This combination of rules can be applied to any chosen view.
Where to start from?
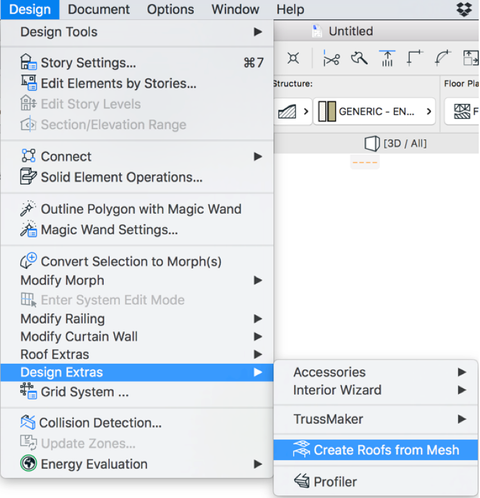
First, we need the terrain, or the mesh, converted into individual roof plans, so we can get each plan of it separately. For that, we will use the Mesh To Roof Add-On. “Create Roofs from Mesh” command will appear in the “Design/Design Extras” menu by default.
 After selecting the mesh and converting it into individual roof plans, we are ready to create a Graphic Override combining customized rules. To create a new Graphic Override combination, go to Documents/Graphic Override/Graphic Override Combinations, click New and name it as Landscaping, for example. Choose the Edit Rules… button and set the rules to color each roof element with different slope angle with a different color. For example, the roofs elements that have the slope angle less then 6% will have its fill surface overridden with a red color pen and its 3D surface will be overridden with a red paint surface. Let’s do a new rule for each range of slope angle 6-12%, 12-20% and so on with different overridden color each.
 Add all these created rules to the new Graphic Override combination as shown below.
 Now go back to the model and apply the new Graphic Override combination on both 2D and 3D view. That should be the result:
 It becomes very clear now where the steep areas of this site are.


Conclusion
Graphic Override can be applied to many other practical daily situations related to project development, quality control and analysis. This combined use of non-visual information and Graphic Override can be very powerful for architects, in the way it helps them to be in control of the "hidden" data inside their BIM models and makes the communication all the way through the project more effective.
Labels:
Related articles
- Catch design issues early: quality assurance with Graphic Overrides in Archicad in Project data & BIM
- Physically based engine in 3D window in Visualization
- Renovation Status for Markers in Documentation
- Why is an office template strategy important? in Project data & BIM
- Who is responsible for the Model Quality Assurance? in Project data & BIM

