- Graphisoft Community (INT)
- :
- Knowledge Base
- :
- Modeling
- :
- Stair Tool Advanced - How to create a Ramp using t...
- Subscribe to RSS Feed
- Mark as New
- Mark as Read
- Bookmark
- Subscribe to Topic
- Printer Friendly Page
- Report Inappropriate Content
Stair Tool Advanced - How to create a Ramp using the Stair Tool?
- Subscribe to RSS Feed
- Mark as New
- Mark as Read
- Bookmark
- Subscribe to Topic
- Printer Friendly Page
- Report Inappropriate Content
on
2018-01-04
04:58 PM
- edited on
2023-10-29
10:19 PM
by
Giovana Benvenuto
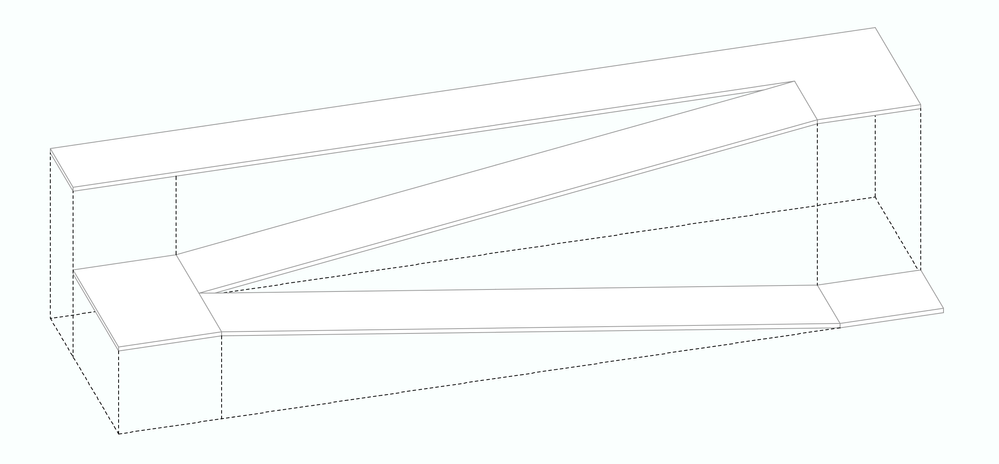
- a complex profile
- a Stair with stringers
- that's all
Structure
Create a custom profile
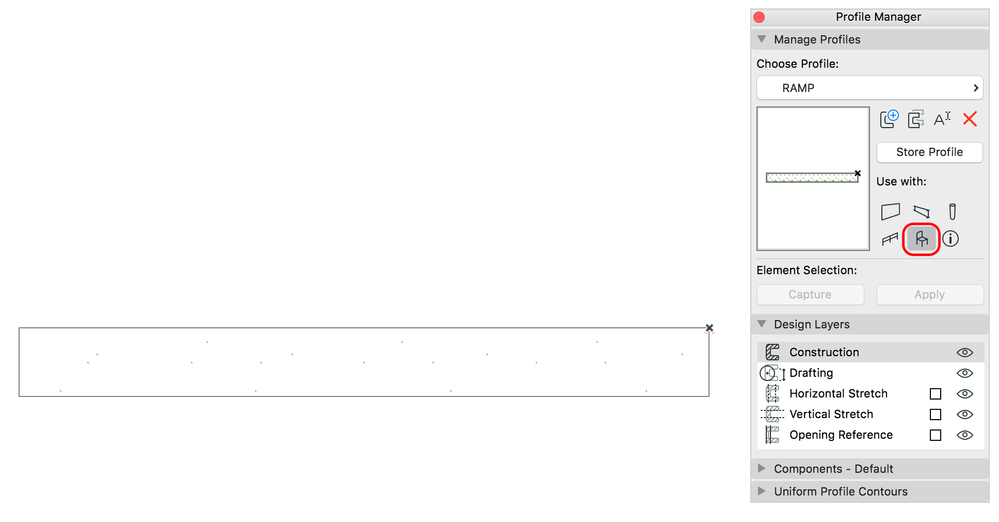
Open the Profile Manager Palette and create a profile with the desired width and thickness of your ramp. Do not forget to check Objects under 'Use with'.
Turn off Finishes in the Stair Default Settings
Activate the Stair and open its Settings. In the Finish page, turn off Finishes (both Treads and Risers) all together.

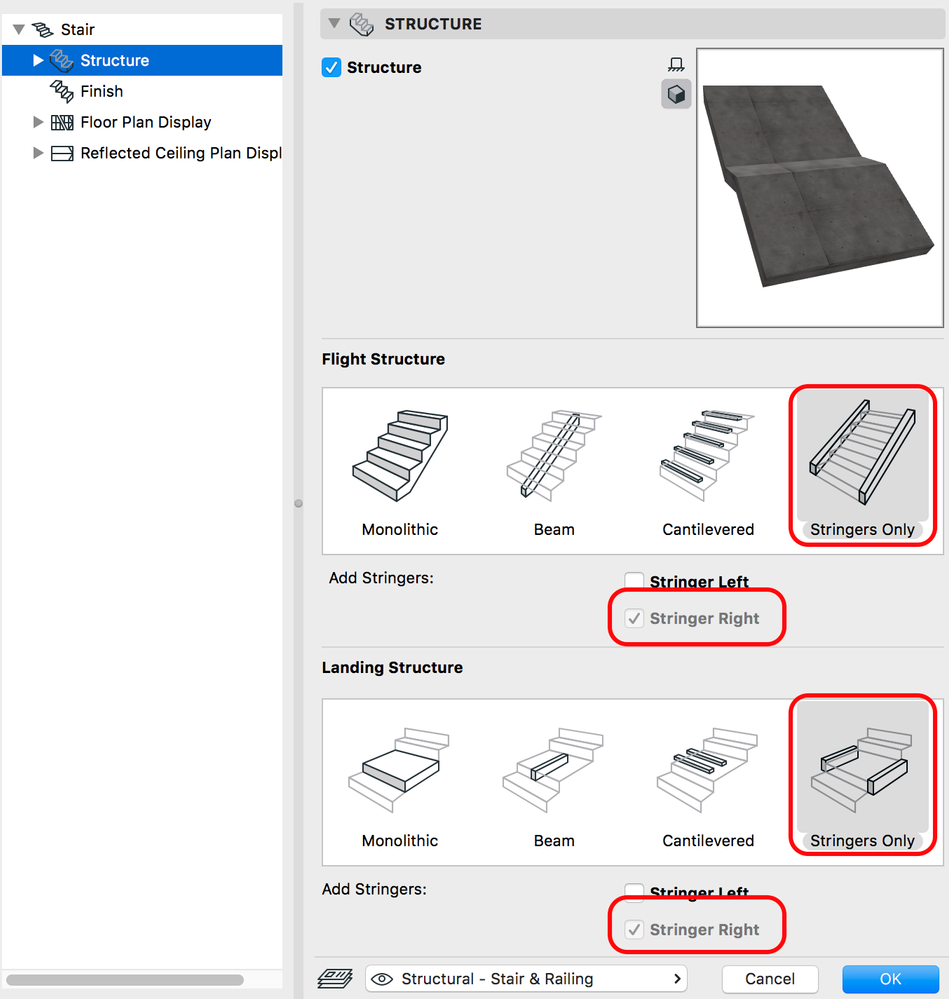
Set Stringer for the Structure and use the custom Profile as Stringer
Use the 'Stringer Only' option for both Flight Structure and Landing Structure. 'Stringer Right' is the only structure you will need. (The right side is used, because of the location of the Profile origin).
Select the custom Profile for the Stringer
Make sure that the 'Stringer Profile Anchor' is set correctly. In this example, the Profile's anchor point (= origin) is at the top right corner, so the Stringer is lined up with the Finish. If the anchor point is in a different place, the Stringer will be placed next to the Finish. In this case, you can fine-tune it with the 'Stringer Profile Anchor' setting under Stair Default Settings / Stringers - Flight / Stringer Component Settings.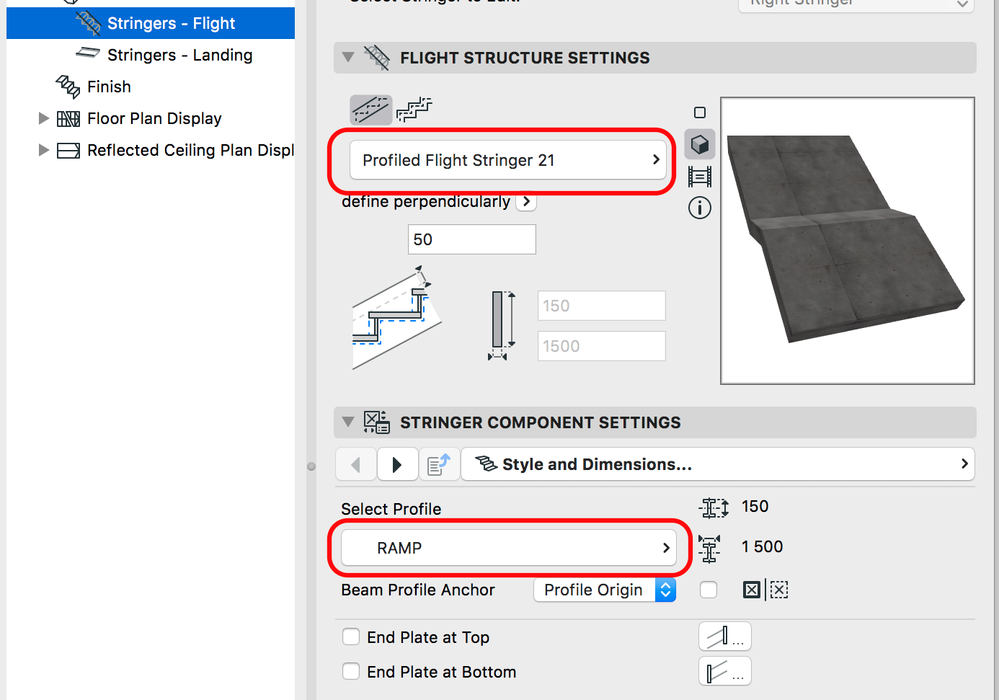
Edit the Support Connections
If we have a landing, we must adjust the Support Connections and use Bisector for the Landing-Flight and the Flight-Landing connections.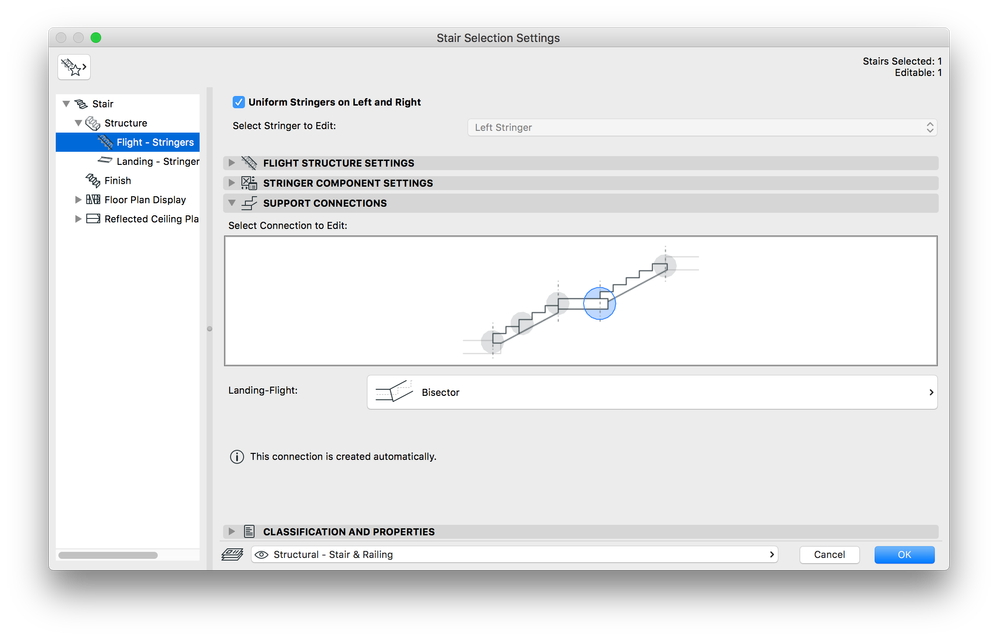
Adjust support ending
Select the Stringers – Flight than adjust the support ending and connections dimensions as desired.
Slope
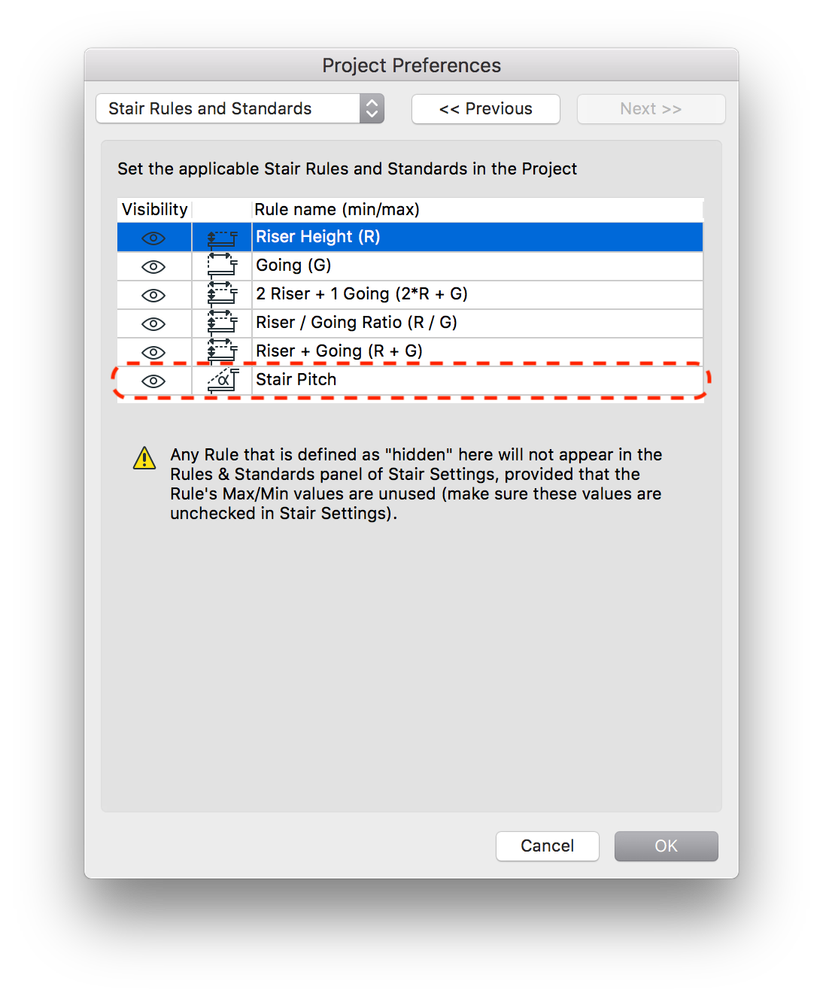
Make "Stair Pitch" visible
Under Options/Project Preferences/Stair Rules and Standards we have control over what is visible in the Stair Settings dialog. By default, the Stair pitch could be turned off here, make sure you turn it on.Set the desired pitch and width
This can be done in the Stair settings. Set the 'Stair Pitch' to match the local standards or your preferred value. If it needs to be a fixed value, the minimum and maximum should match.
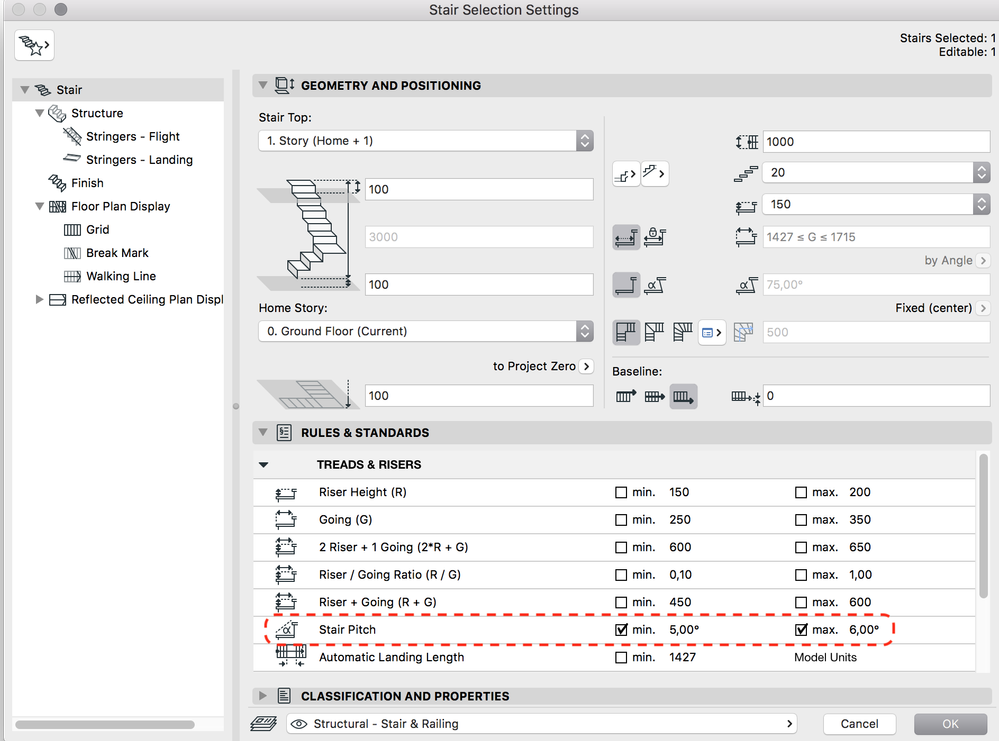
Floor Plan Display in ARCHICAD 21
We can manipulate the Stair Floor Plan display to achieve the correct representation of a Ramp on the Floor plan. Basically, we get a fully functioning Ramp.Settings
Under Floor Plan Symbol Components - uncheck Model View Option, and select: Walking Line, Up/Down Text, and Structure. Adjust the Relevant and Above Relevant Symbol settings.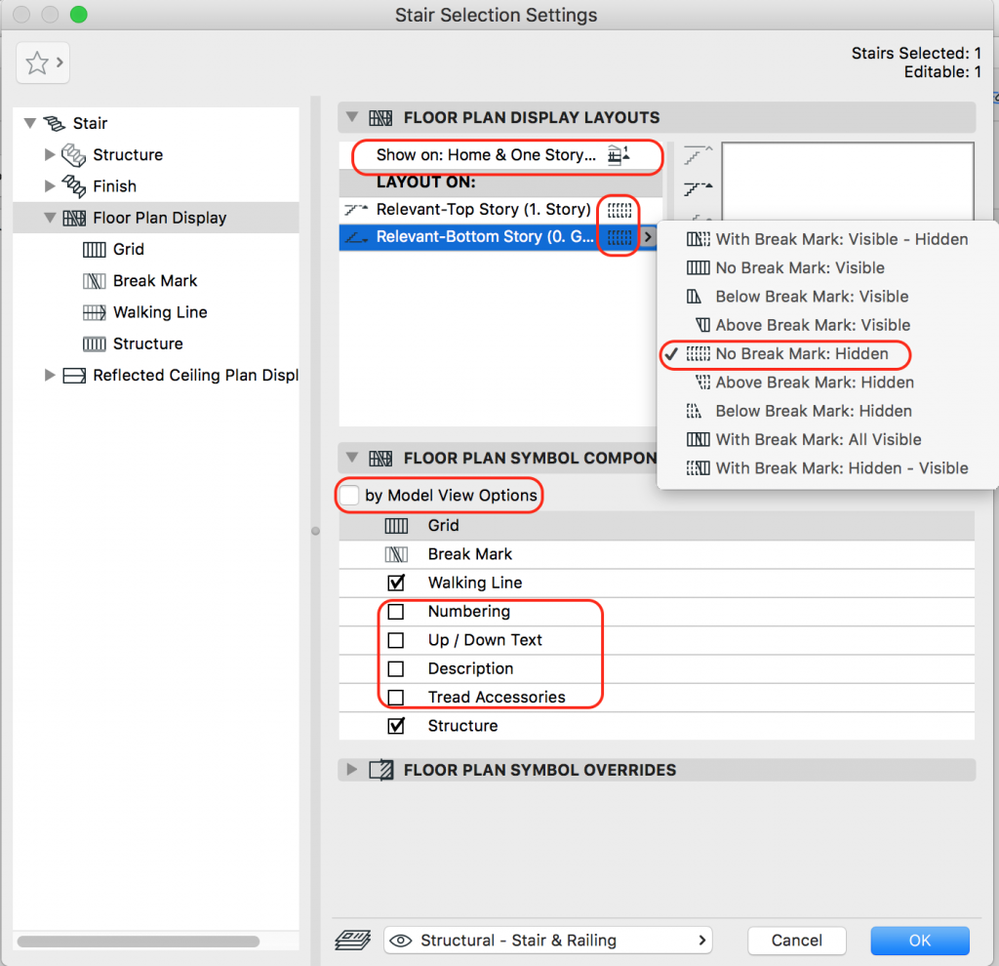

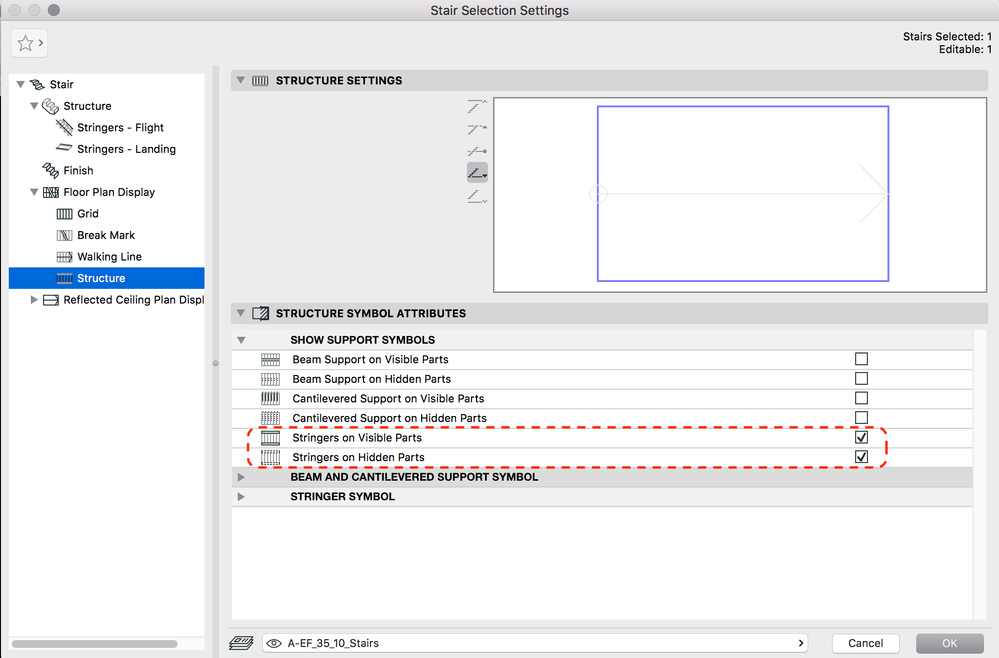
Draw your ramp in floor plan view or 3D view
Floor Plan Display in ARCHICAD 22
In ARCHICAD 22 under the Floor Plan Display of Stairs, you will find the Grid and the Structure under the same tab. It changed due to a new feature in the Floor Plan Display, the 2D representation for monolithic structures (read more about other new Stair Tool related features: Stair Tool - Further enhancements) To create the floor plan representation of a Ramp, we will ned to make the following settings in the Stair Settings dialog: Make the element independent for the MVO (Model View Options) settings by unchecking "by Model View Options" under Floor Plan Display: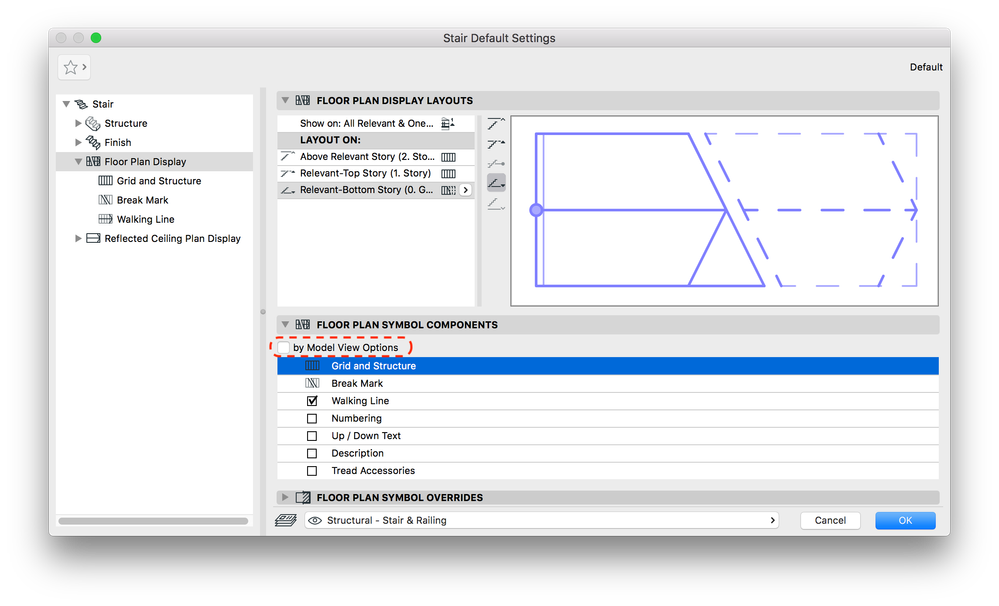
The good thing is, once we have made all these settings and have a Ramp placed in our project, we can use it over and over again if we save it as a Favorite. We covered how to save one and other favorites for sub-elements in this article.
- Mark as Read
- Mark as New
- Bookmark
- Permalink
- Report Inappropriate Content
This process is a disaster. Fix fast.
- MEP Designer – Modeling, documentation and calculations in MEP
- Create visual cutaway for your client in Visualization
- Enhancing Conceptual Design with Archicad 28’s built-in AI Visualizer in Visualization
- Archicad Start Edition 2024 in Getting started
- BIMcloud SaaS - Management features and tools in Teamwork & BIMcloud
