Turn on suggestions
Auto-suggest helps you quickly narrow down your search results by suggesting possible matches as you type.
Showing results for
Turn on suggestions
Auto-suggest helps you quickly narrow down your search results by suggesting possible matches as you type.
Showing results for
- Graphisoft Community (INT)
- :
- Knowledge Base
- :
- Teamwork & BIMcloud
- :
- How to Downgrade from BIMcloud to BIMcloud Basic
Options
- Subscribe to RSS Feed
- Mark as New
- Mark as Read
- Bookmark
- Subscribe to Topic
- Printer Friendly Page
- Report Inappropriate Content
How to Downgrade from BIMcloud to BIMcloud Basic
Community Admin
Options
- Subscribe to RSS Feed
- Mark as New
- Mark as Read
- Bookmark
- Subscribe to Topic
- Printer Friendly Page
- Report Inappropriate Content
2020-07-08 10:00 AM - edited 2025-02-13 03:45 PM
Preparation is key to an uneventful downgrade process. The more features of BIMcloud that were used the more important the preparation process is. For instance, in step 3 shown below, one will be required to delete incompatible projects. To preserve some continuity with those users who depend on projects that will become incompatible with the downgrade it is important to migrate them prior to the downgrade. Although the downgrade assistant allows for the smooth transition from a feature rich BIMcloud to the Basic version, one should still fully understand the following 14 steps and finalize certain preparatory work prior to initializing the assistant.
 WARNING: Downgrade process is available only for the "masteradmin" user. Other users, even with Server Administrator role or Full access permission are not able to start this process.
Steps:
Initialize the Downgrade Process
The downgrade process is started under the BIMcloud Manager License panel,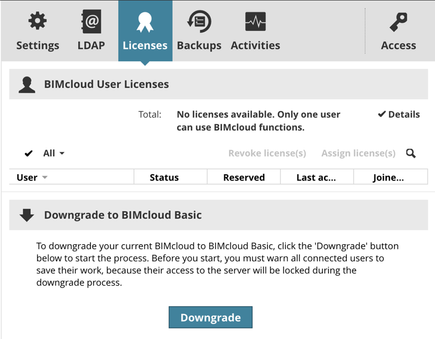
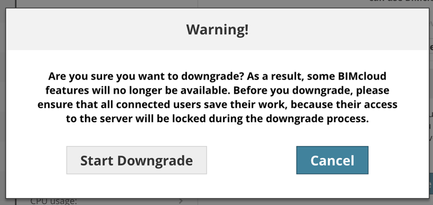
1. Create a BIMcloud Backup
Even though the downgraded BIMcloud Basic will not be able to create a BIMcloud backup, it can restore one which makes it a wise first step.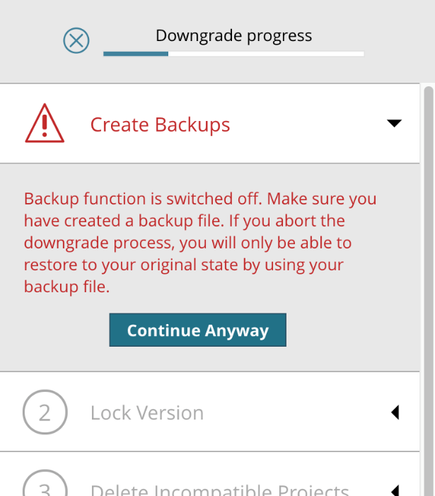
2. Lock Version
While BIMcloud supports multiple versions of Archicad client data, BIMcloud Basic can host only one version of Archicad.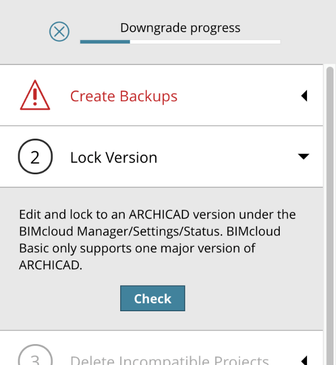


 WARNING: This is the last time you can modify which Archicad version you would like BIMcloud Basic to support. A successfully completed step will have a checkmark and its box will be greyed out.
3. Delete Incompatible Projects
Incompatible projects do not share the version the BIMcloud Basic was locked to in step 2. If the BIMcloud Basic is locked to v22, then v19, v20, or v21 projects are incompatible and must be removed.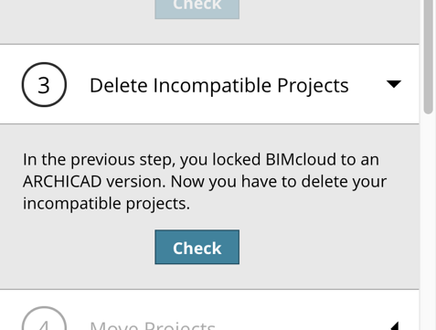

4. Move Projects
The project folder hierarchy of BIMcloud Basic allows for only a topmost level of folders. Steps 4,5,6 are part of the process of flattening out the BIMcloud project hierarchy in preparation for BIMcloud Basic.
5. Move Libraries
In the below example, the libraries found in the folders are moved, since BIMcloud Basic does not support project libraries or for that matter the sub-folder hierarchy. After v22 project libraries have been moved, the projects that reference the moved libraries will need to have their library links manually updated to the new location.
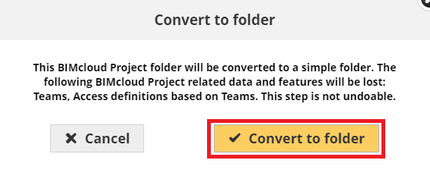
6. Eliminate BIMcloud Projects
BIMcloud Projects are special folders, which are not available in BIMcloud Basic. Before you can continue with the process, you must convert your existing BIMcloud Projects to regular folders.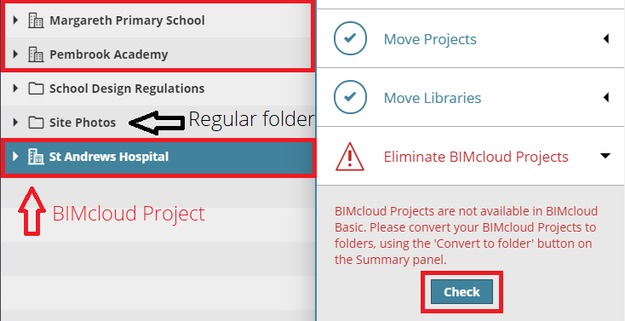

7. Download then Remove File(s)
Files, such as PDFs or IFCs, must be removed from BIMcloud Server before the Downgrade process finishes.

8. Eliminate Sub-Folders
The project hierarchy is flattened to a depth of one folder. Folders used to store project libraries are removed.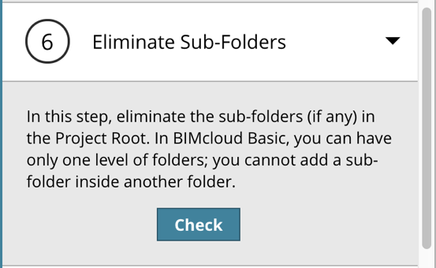

9. Delete All Tags
If any of the users applied the Tags feature, the downgrade process will remind you to delete all tags before you can complete the process.

10. Disconnect BIMcloud Servers
In case a BIMcloud includes more than one BIMcloud Servers, you need to disconnect them. BIMcloud Basic is not allowed to pair more than one Server to a Manager at the same time, as this is a licensed only feature of BIMcloud. More information about how to disconnect BIMcloud Servers can be found in our BIMcloud User Guide.11. Disable external Snapshot folder
Storing Snapshots on an external storage folder is not allowed in case of BIMcloud Basic. In this process a user will get a warning to check in BIMcloud Server's Configurator settings if this feature is enabled or not. When external Snapshot folder stays turned on, BIMcloud Server is not able to start for BIMcloud Basic unless the feature is turned off again. More information about external Snapshot folders and their settings can be found in our "How to configure snapshots to an external storage" Help Center article.12. Move BIMcloud Server
Using folder hierarchy for managing BIMcloud components, such as BIMcloud Servers, is not allowed in BIMcloud Basic. BIMcloud Server must be moved back to the root on Servers page of BIMcloud Manager. More information about how to move BIMcloud Server can be found in our BIMcloud User Guide.13. Move BIMcloud Manager
Using folder hierarchy for managing BIMcloud components, such as BIMcloud Manager, is not allowed in BIMcloud Basic. BIMcloud Manager must be moved back to the root on Servers page of BIMcloud Manager. More information about how to move BIMcloud Manager can be found in our BIMcloud User Guide.14. Eliminate Folders from Server Root
Similar to the project folder hierarchy flattening process, the Server Root is flattened in previous steps. With BIMcloud Basic the Server and Manager must be hosted on the same machine. In the process of disconnecting BIMcloud Servers it is important to keep the server that was installed on the same host machine as the BIMcloud Manager. In the below illustration the final BIMcloud server, the one that was installed on the same host machine as the BIMcloud Manager, is still left in its containing folder. Since the Server list in BIMcloud Basic can only be a flat list, the “Spinning Iron” named server must then be moved to the same level as the BIMcloud Manager.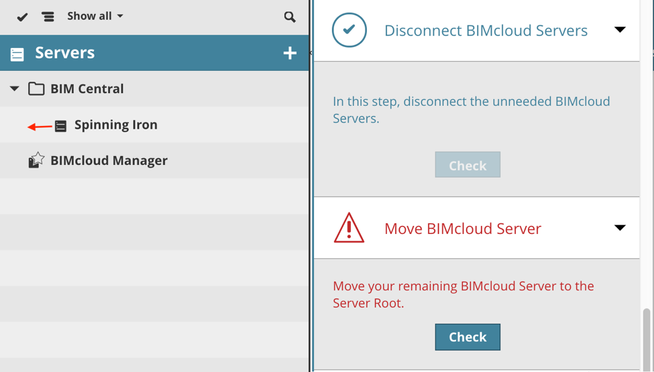


15. Change to Simplified Permission
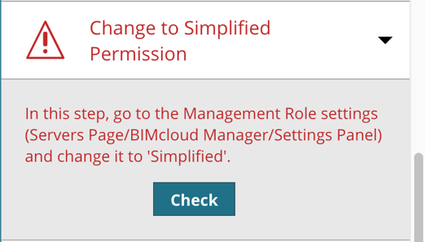
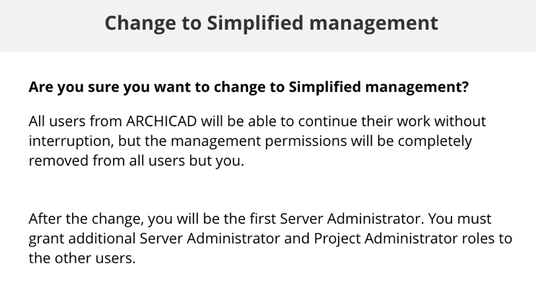
16. Disconnect LDAP Services
For completeness’s sake a step to ensure LDAP disconnection has been added, though it is highly unlikely a BIMcloud user taking advantage of LDAP would downgrade to BIMcloud Basic and forfeit single sign in, automatic user population and detailed permissions. In general, a user downgrading to BIMcloud Basic will not have to address this step, since it wasn’t considered in the pilot set up.Finalize the Downgrade
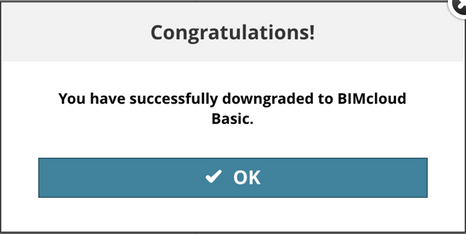
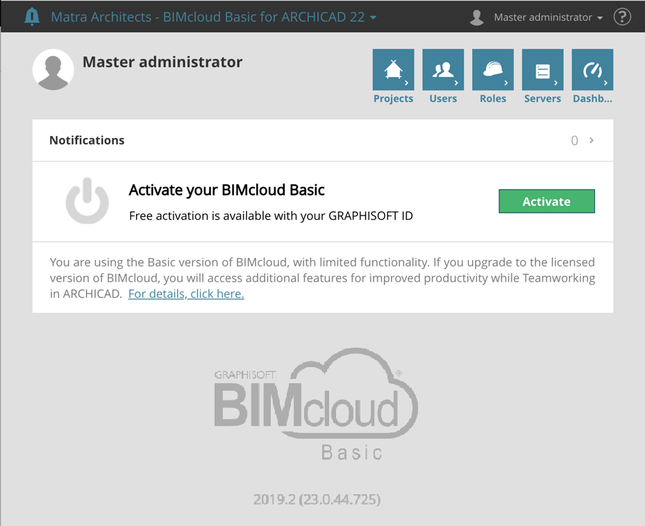
Once all 16 tasks have been checked for completeness the downgrade can be run. This process may take a few minutes and while it is running any user who tries to login to the BIMcloud Manager will be presented with the following notification:
Labels:
Related articles
