- Graphisoft Community (INT)
- :
- Knowledge Base
- :
- Modeling
- :
- How to create a custom Grid Pattern Scheme for the...
- Subscribe to RSS Feed
- Mark as New
- Mark as Read
- Bookmark
- Subscribe to Topic
- Printer Friendly Page
- Report Inappropriate Content
How to create a custom Grid Pattern Scheme for the Curtain Wall
- Subscribe to RSS Feed
- Mark as New
- Mark as Read
- Bookmark
- Subscribe to Topic
- Printer Friendly Page
- Report Inappropriate Content
on
2018-06-29
06:06 PM
- edited on
2021-11-29
12:47 AM
by
Rubia Torres
Use the Scheme page of Curtain Wall Settings to set up a Grid Pattern for the Curtain Wall. The best way to start a custom grid is deleting any existing grid. For that click on the Clear Pattern button on top right side of the scheme preview window.
Trick: Before start adding the desired Columns and Rows change the Frames on Top and Right Side to Division Frame Class. To do that click on the frames using the Interactive Pattern Preview Window. Use the Shift button to select and edit both frames at the same time.

After that start adding the Columns and Rows as needed.
Adding Columns and Rows
Use the Insert Panel Column button represented by the “+” sign to add new Columns. Same logic can be applied to Rows. Increasing Letters and Numbers will appear as you add more Columns and Rows, respectively. For editing the sizes click on top of the number on the Width or Height column and insert the new dimension as desired.

To delete a Column, select the row related to it and click Remove Selected Column. You can also select the cell panel on the Pattern Preview Window to highlight the desired Column to remove. Same logic can be applied to Rows.
Pattern Distribution
There are three different Pattern Distribution options for both rows and columns:

Fixed Sizes: Set each Column width and/or each Row height to an exact size;
Best Division: The Curtain Wall pattern will exactly match with the end of the Curtain Wall segment, without any “leftover”. ARCHICAD will calculate the most closely sizes that match the original intended sizes for columns and rows;
Number of Divisions: Specify the number of times the pattern scheme should be repeated within the curtain wall segment.
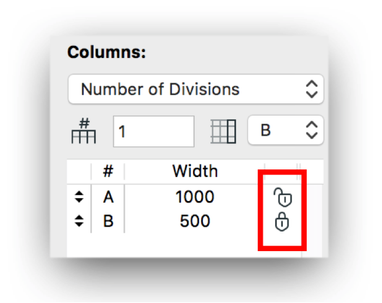
Note that, when choosing Best Division or Number of Division option, a lock icon will appear next to the columns and rows sizes. The lock icon defines if the Column/Row size should be fixed or flexible. At least one Row and one Column must be set to flexible. This means it might be stretched or shrunk accordantly to the entered size.

For the last, select desired Frames and Panels and change them to the preferable Frame and Panel Classes. All created Classes for this Curtain Wall will be available on the dropdown menu below the Interactive Window Preview. Select Frames and Panels, each component type at a time to change its class. To a multiple selection of the same component type, Frame or Panel, use the Shift button to add selection then change its class.
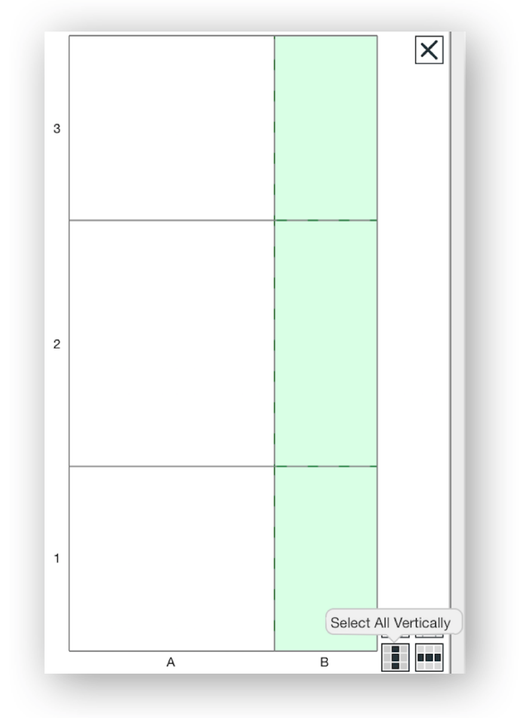
The Select All Vertically and All Horizontally can be very handful in some situations.

- How to customise your curtain wall in Archicad? in Modeling
- Buildability Detailed Design and Implementation Plan with Archicad 19 + Excel in Project data & BIM
- Labeling IDs of Surfaces and Building Materials in Documentation
- Polygon Reduction in Archicad in Project data & BIM
- Archicad versions in Getting started
