 Welcome to our series of articles from the One Override To Rule Them All challenge!
We invited some of the participants of the challenge to elaborate on their entries, share their workflows and tips & tricks.
Enjoy and feel free to start a thread in the Documentation forum if you have any questions.
Let's learn how Bart Cuppens used Graphic Overrides to enhance the functionality of Zones.
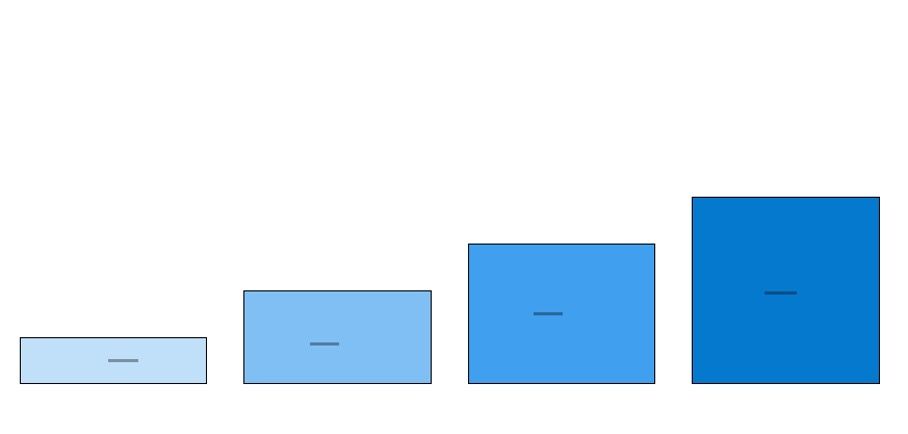
There are 4 different sizes of zones we want to differentiate:
- Surface area below 50m2
- Surface area between 50m2-74m2
- Surface area between 75m2-99m2
- Surface area above 99m2
Step 1
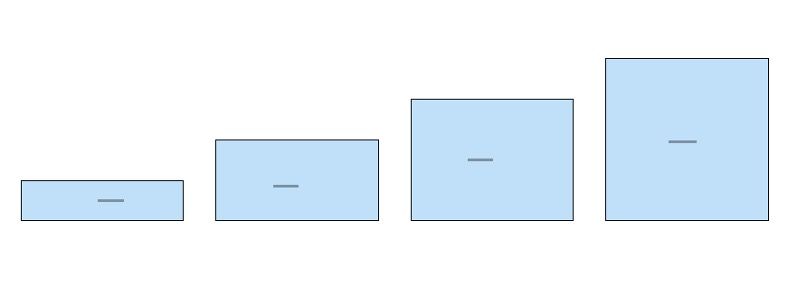
Draw 4 zones with different sizes: 25, 50, 75 and 100m2
Step 2
You need the setup a property before setting up the Graphic Overrides (the measured area is not listed in the Graphic Overrides criteria).
1. Go to Options > Property Manager and add a New Group.
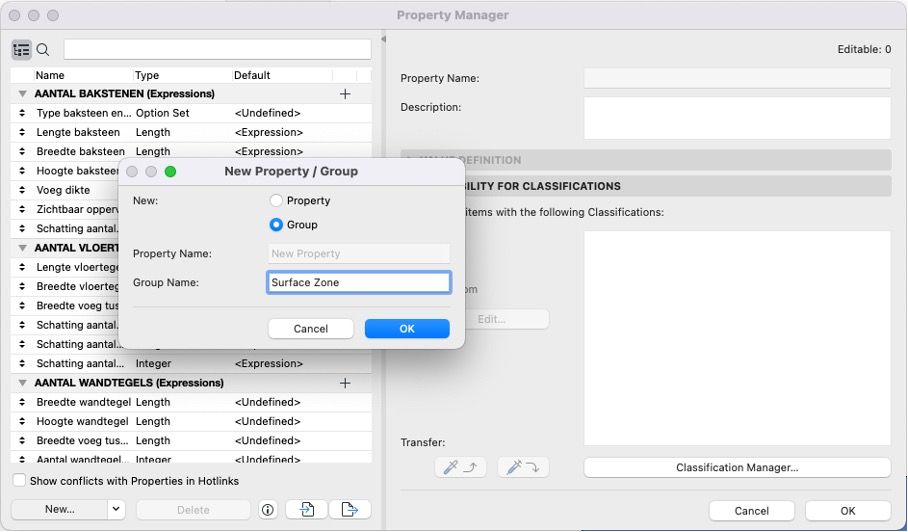
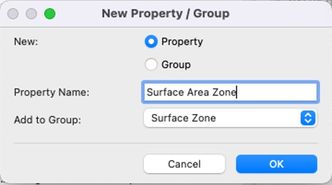
2. Add a new property in the group called Surface Area Zone.
3. Choose Area as the data type and click on Expression. the Expression Editor will appear.
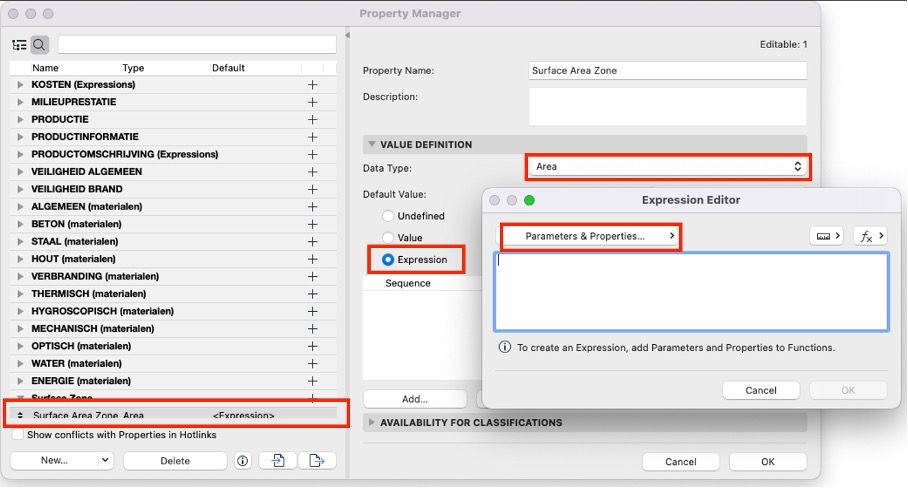
4. Click on Parameters & Properties to add the parameter Measured Area from the zone list and press OK.
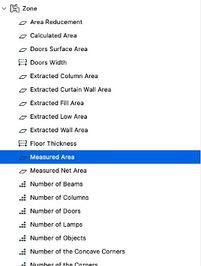
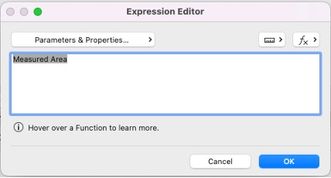
5. Make sure the property is available to the classifications (custom or all).

Step 3
Now you can start setting up the Graphic Overrides.
1. Open the Graphic Overrides Combinations by clicking on the icon in the bottom (1), make a new override and give it a name.
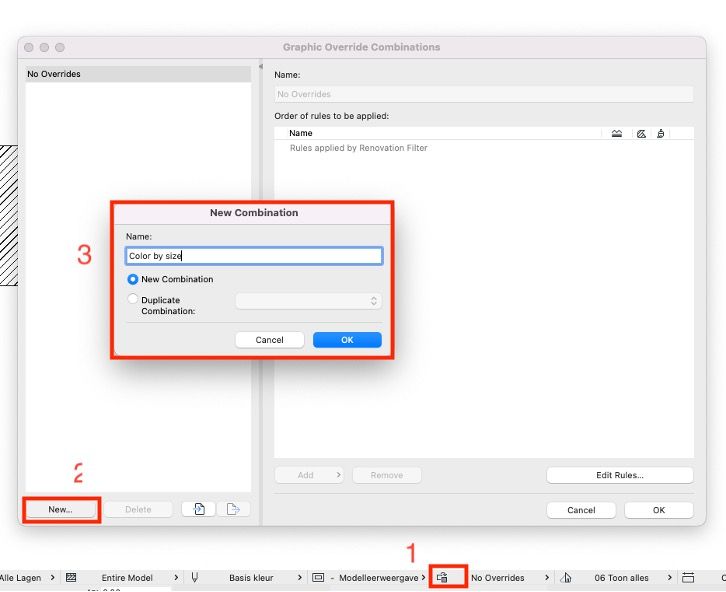
2. You’ll have to make 4 rules, one for each color or fill percentage.
|
Surface area below 50m2
|
 |
|
Surface area between 50m2-74m2
|
 |
|
Surface area between 75m2-99m2
|
 |
|
Surface area above 99m2
|
 |
Rule 1: 0-49m2
This rule will give all fills a base color, the other rules will override this one when the measured area is higher than 49m2. Feel free to add more criteria based on layers, etc.
As criteria, choose Zone as the element type to filter all zones:
- Choose a 25% fill and override the cover fill (1)
- Choose a foreground pen color for the cover fill
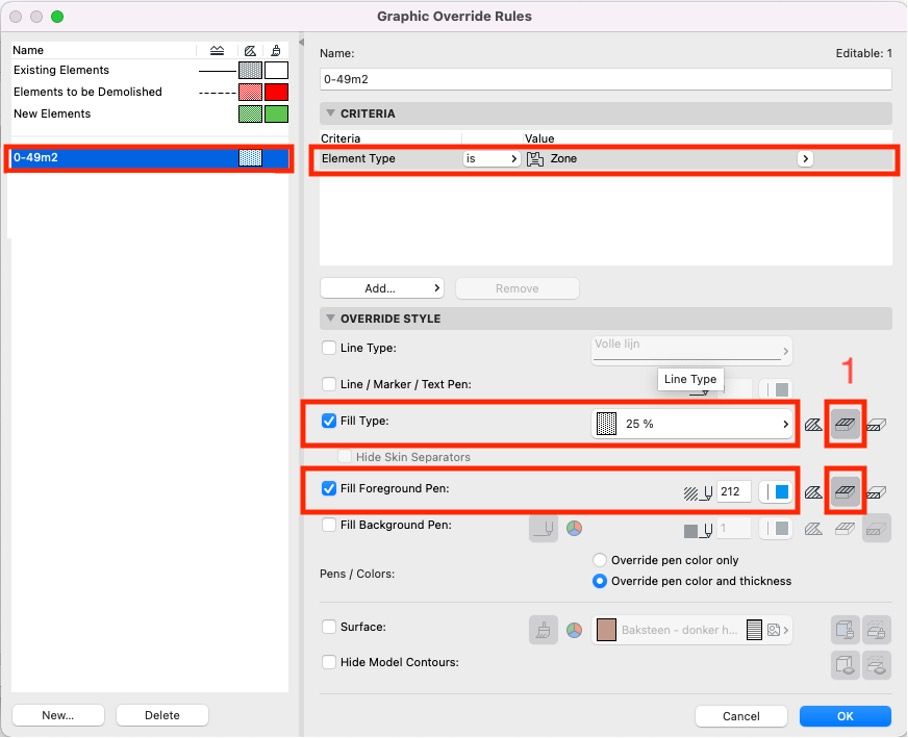
This graphic override will make all zone fills light blue.
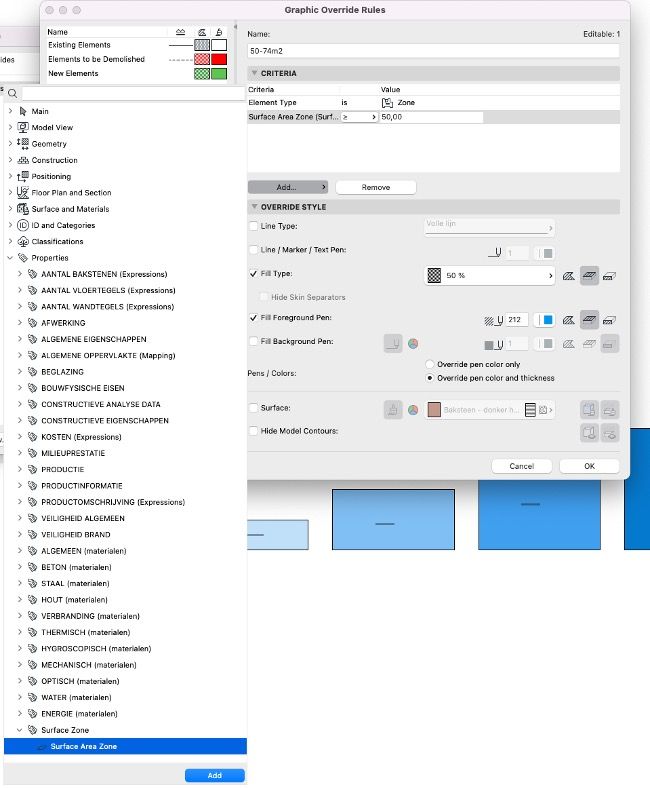
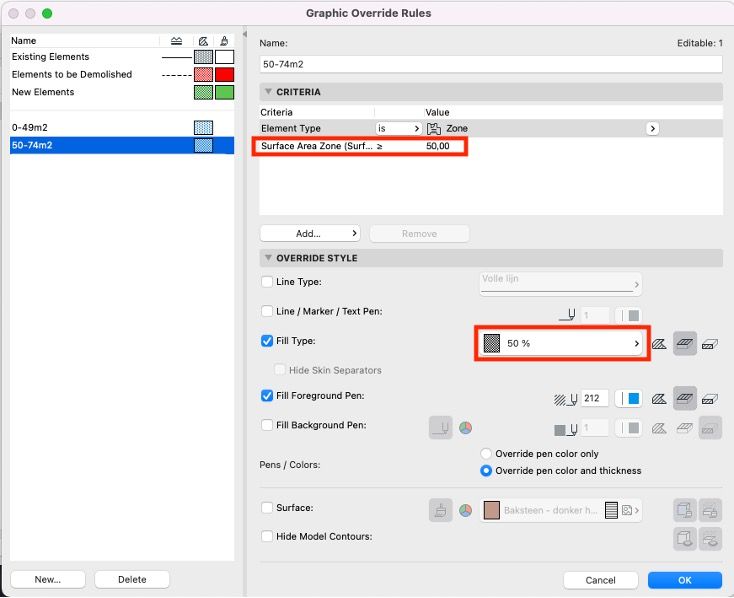
Rule 2: 50-74m2
1. Duplicate the first rule and rename it.

2. Add the newly made parameter under the criteria surface area zone and restrict it to all areas above 49m2 (>=50).
2. Change the fill type to 50%.
Rule 3: 75-99m2
1. Duplicate the last rule and rename it to 75-99m2.
2. Set the criteria value to 75 and change de fill type to 75%.

Rule 4: 100m2
1. Duplicate the last rule and rename it to 100m2.
2. Set the criteria value to 100 and change the fill type to solid.
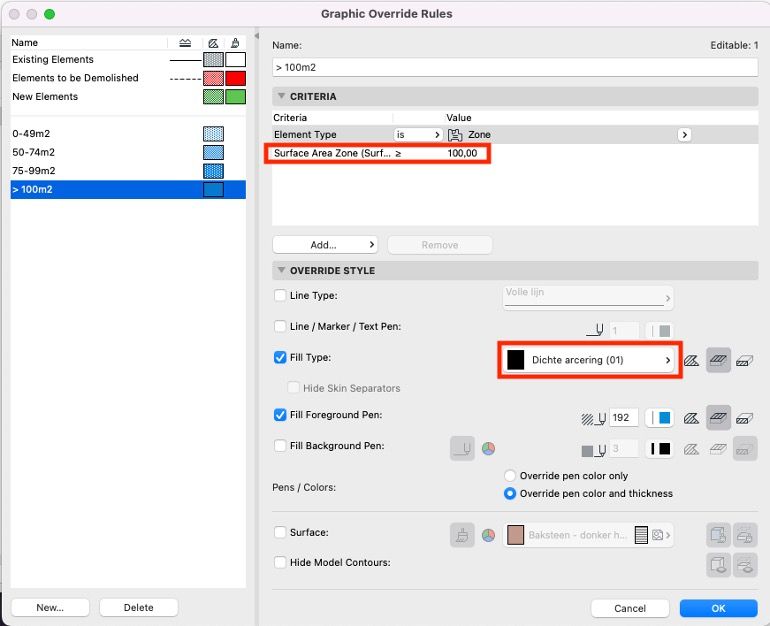
Color by size should look like this:

Note: Make sure the order of the rules is the same. Higher rules in the list overwrite the lower ones.
The graphic overrides should change zone colors based on size:
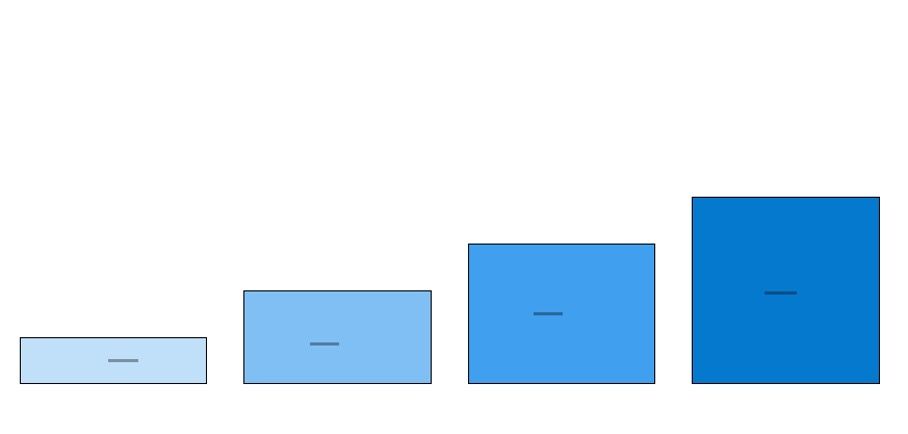
Final result
Get to know Bart Cuppens:
Bart works as an architect in a firm of 50+ employees and teaches Bachelor students of first and second year at Hasselt University's Architecture school. He has many years of experience in architectural visualizations using Cinema 4D and V-Ray.